
This article offers an overview of configuration options for the header and footer portions of your website. Detailed instructions about how to make these changes may be in other articles, but here we'll explore the customization options.
Header Options
Customize Logo
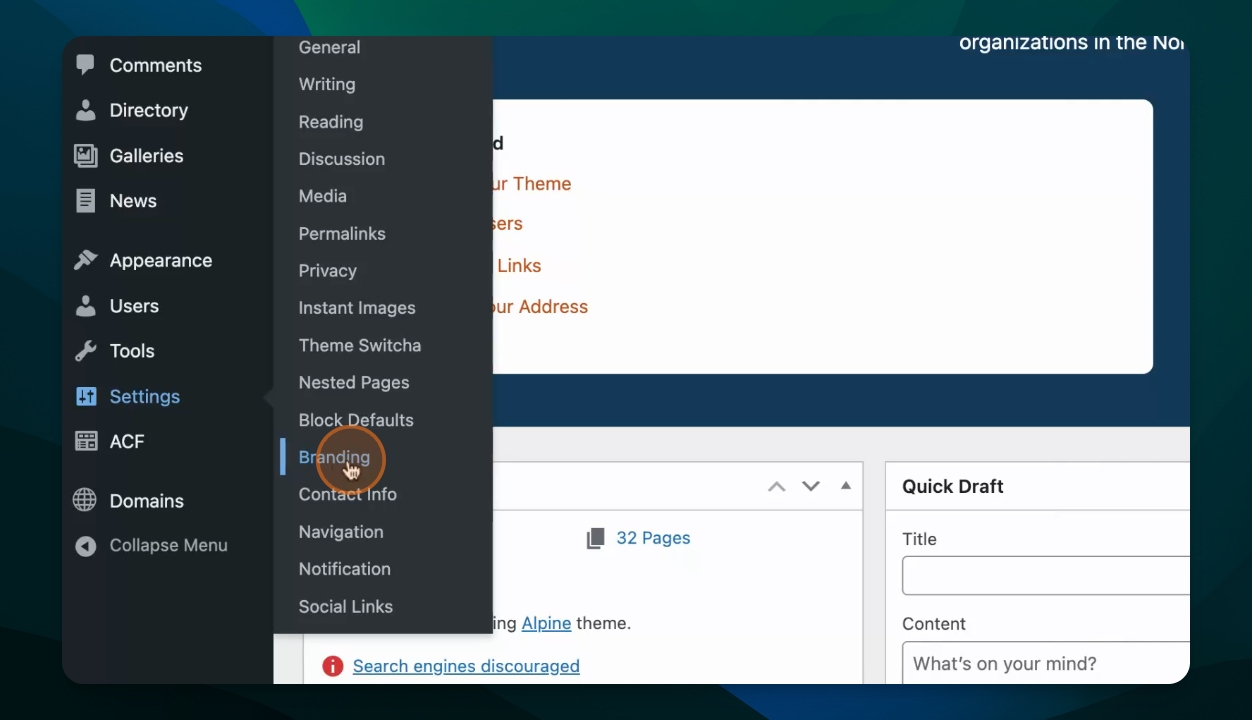
To add or change your logo, you'll go to Settings and then Branding. Here you can set a custom logo and there's also an option to not display the site title. If your logo file already contains the name of your organization, you may need to adjust the width to make sure that name is readable for the logo. Be sure to save your changes when you're done making edits.
Learn more:
Edit Main and Secondary Menu

The next portion of your site includes the main menu and optional secondary menu. These are editable under Settings and Navigation. The secondary menu items will appear between the Call to Action and the social media icons if set.
Learn more:
Set Social Media Icons
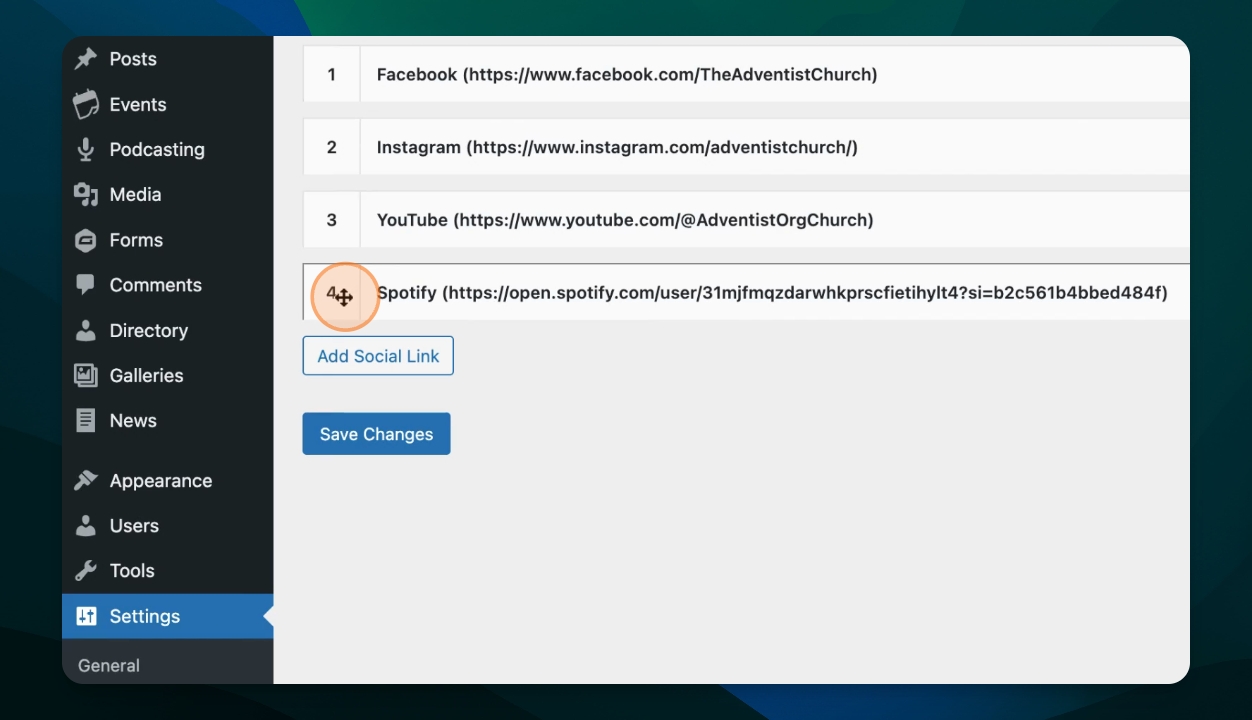
You can display up to three Social Media Icons in the header, with additional links showing in the footer. The social media icon settings are under Settings and Social Links. You can reorder these to make sure that the ones that you want are displayed in the header.
Learn more:
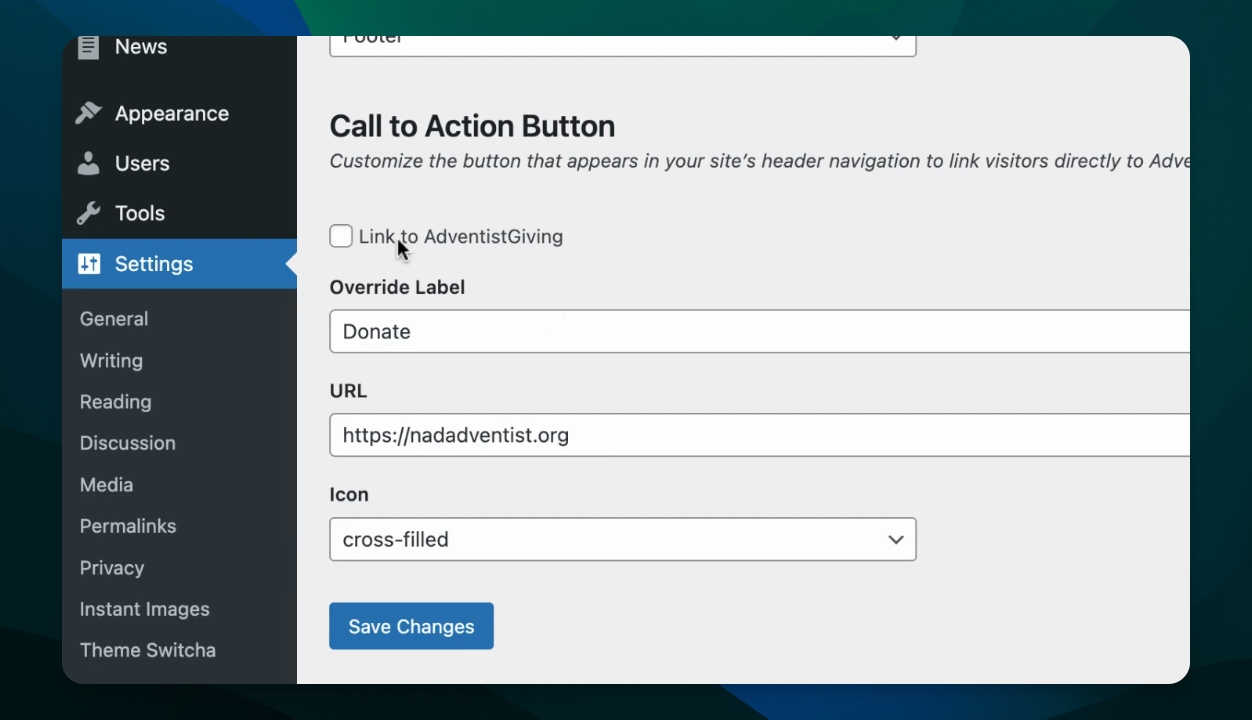
Edit Call to Action Button
The Call to Action button is visually different than other menu items, making it excellent for urging visitors to take action. Think of this option for donations, scheduling school visits, or registering for your ministry service. The Call to Action button is configured in Settings, then Navigation.
Learn more:
Customize Hero Section with Theme
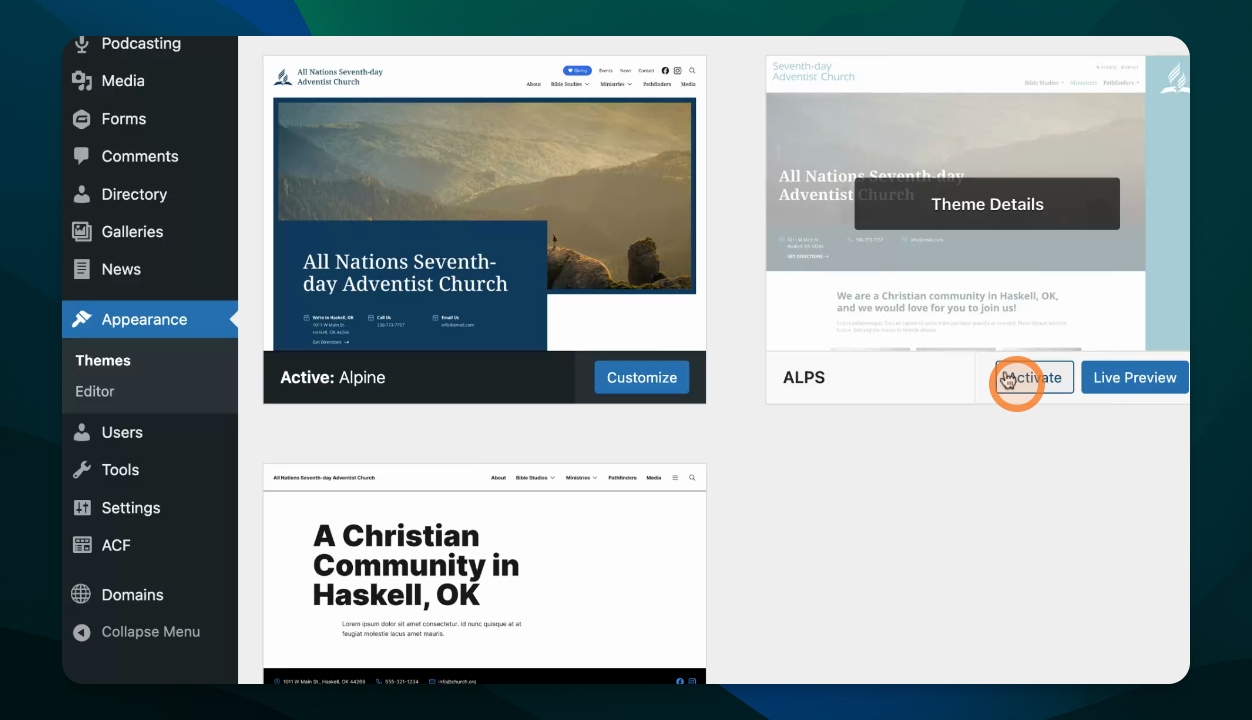
The next portion of the header is the Hero section, and its design depends on what theme is selected. One of the easiest ways to change how this portion of your site looks is by changing themes, which can be done under Appearance and Themes.
Learn more:
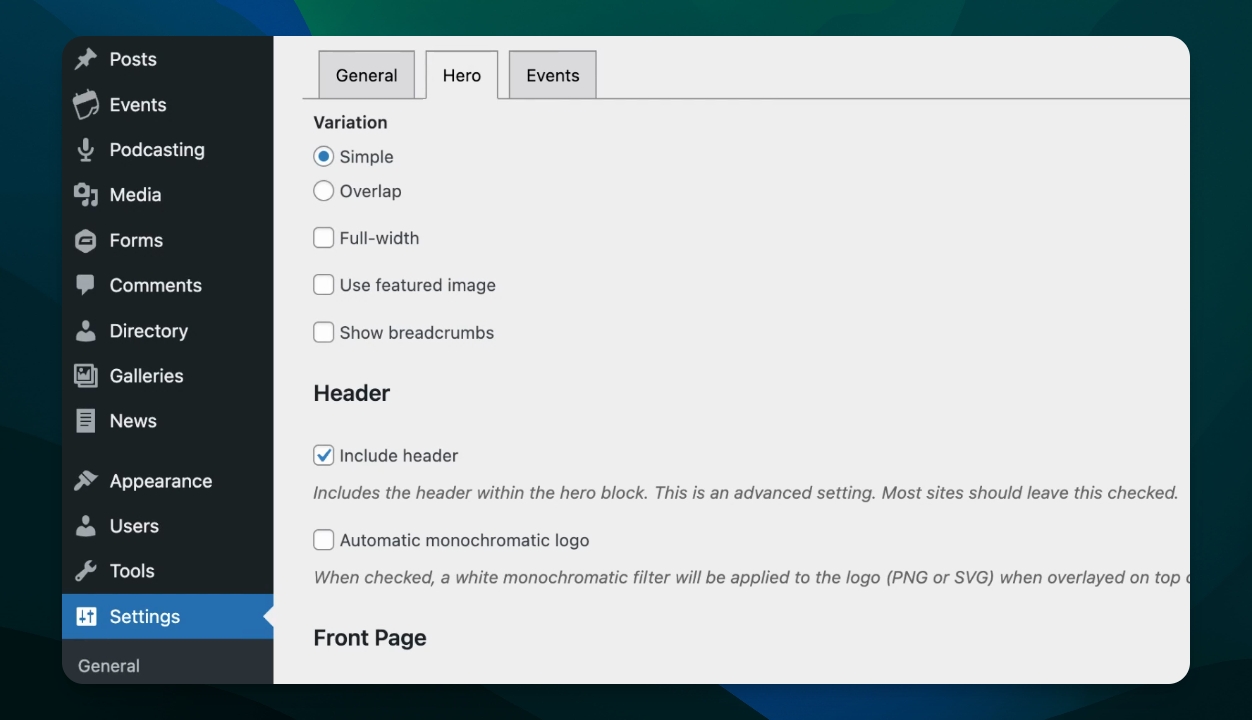
Adjust Hero Settings
Additional changes can be made to the look of the hero section within a selected theme. Under Settings and Block Defaults, there are quite a few different options that affect the Hero section. Explore hiding or showing the featured image, full width, and breadcrumb display options.
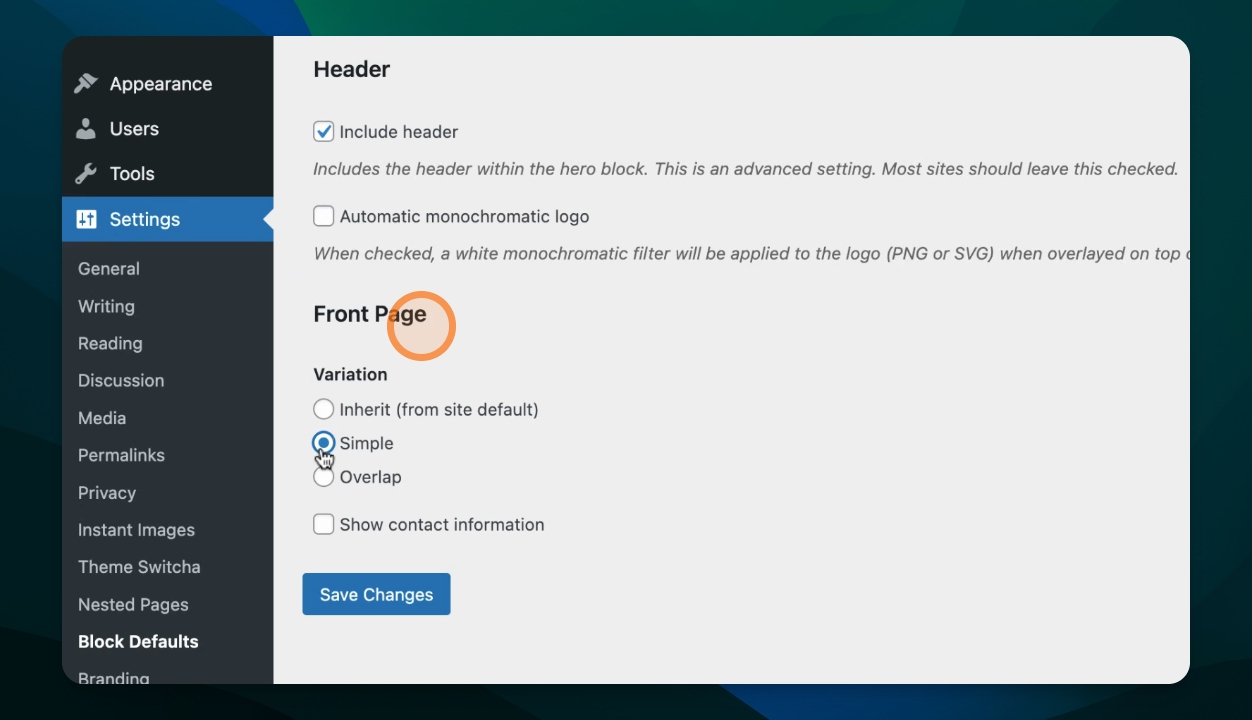
Adjust Home Page Hero
The hero section on the home page has some additional display options also available under Settings > Block Defaults. Explore these different options to see what fits your ministry best.
Footer Options
Verify Name and Contact Info
Back in the dashboard, your organization name and address are configurable from the General Settings and the Contact Info settings respectively.
Learn more:
Set Social Media Links in Footer
The footer displays all of the social media links set under Settings and Social Links in the order listed.
Learn more:
Edit Footer Menu
A custom menu can be configured for the footer area of your site. This is often a good place for links helpful to those who already know your organization.
Learn more: