
A logo can be a great branding tool that helps users quickly recognize your ministry. All Frame sites are automatically set to display the Seventh-day Adventist Church logo, but a custom logo can easily be made and displayed in its place. Let's discuss some considerations for creating a logo and the steps to add it to your Frame site.
Creating a Logo Image
If you don't have a logo for your website yet, here are some important tips:
Use a .png file with a transparent background for best results across your site
Keep the design simple so it looks good on all different types of screens
Create a smaller version of your logo to use as your site icon (favicon)
TL;DR
Let's Do It Together!
Step 1: Access Branding Settings
Log into your account and navigate to your Dashboard.
Scroll to find Settings and then select Branding.

Step 2: Select Your Logo
Choose an image to upload as your logo in the branding section.
If you want to include custom text beside the icon, enter it in the provided field.
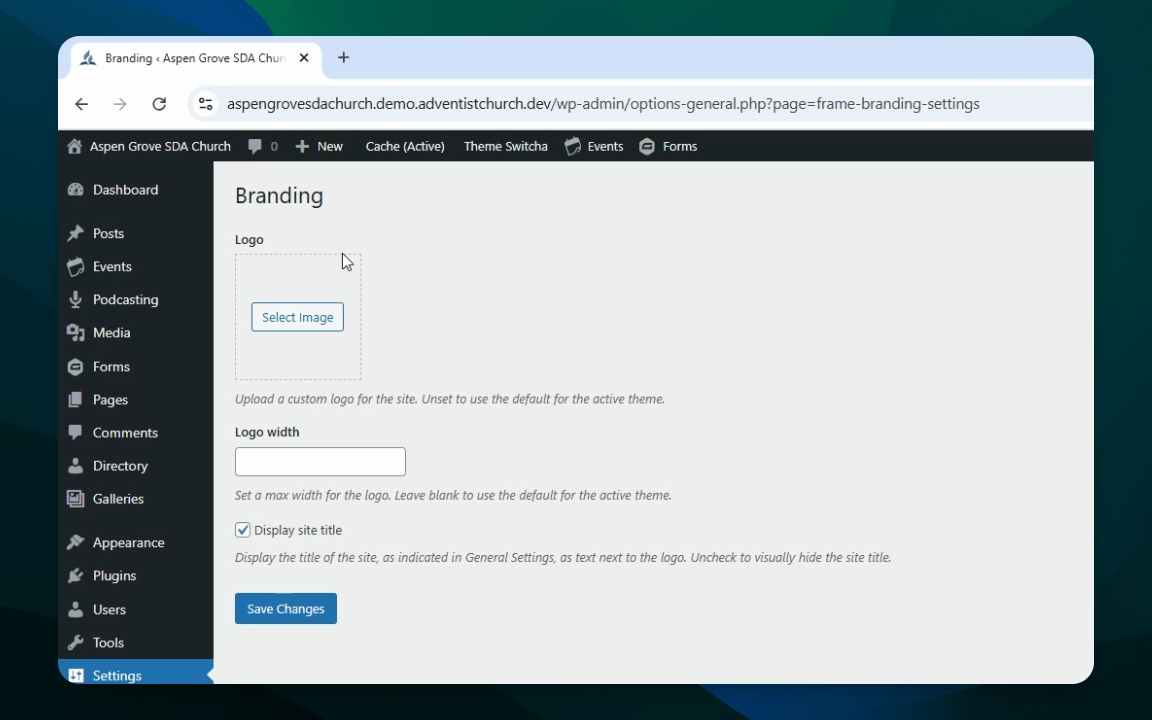
Step 3: Set Logo Width
If you have text next to the icon, specify a maximum width for your logo.
We recommend a width between 300 and 325 pixels.
Type 300 in the width field and uncheck the box for custom display if needed.

Step 4: Save Changes and Refresh
Click Save Changes.
Refresh your website to see the new logo at the top portion of your site.