
Posts vs. Pages
Posts
Posts are time-based content entries that appear in reverse chronological order on your blog. They're ideal for:
Regular blog updates
News announcements
Sermons or devotionals
Event recaps
Pages
Pages are for timeless, non-chronological content that remains relevant regardless of when it was published. They help organize your site structure and typically include information like:
About
Contact
Ministry Information
Location & Service Times
Staff
Key Differences
Pages are excluded from your blog’s chronological post list.
Pages support parent-child hierarchies, allowing main pages with subpages.
Unlike posts, pages do not use categories or tags by default.
Pages are not included in RSS feeds.
You can assign different templates to pages for unique layouts.
Organizing Pages
To see all pages on your WordPress site:
Log in to your WordPress dashboard
Click Pages in the left navigation menu
The Pages screen will display a complete list of all pages on your site. You can click and drag a page to reorder it in the navigation menu.
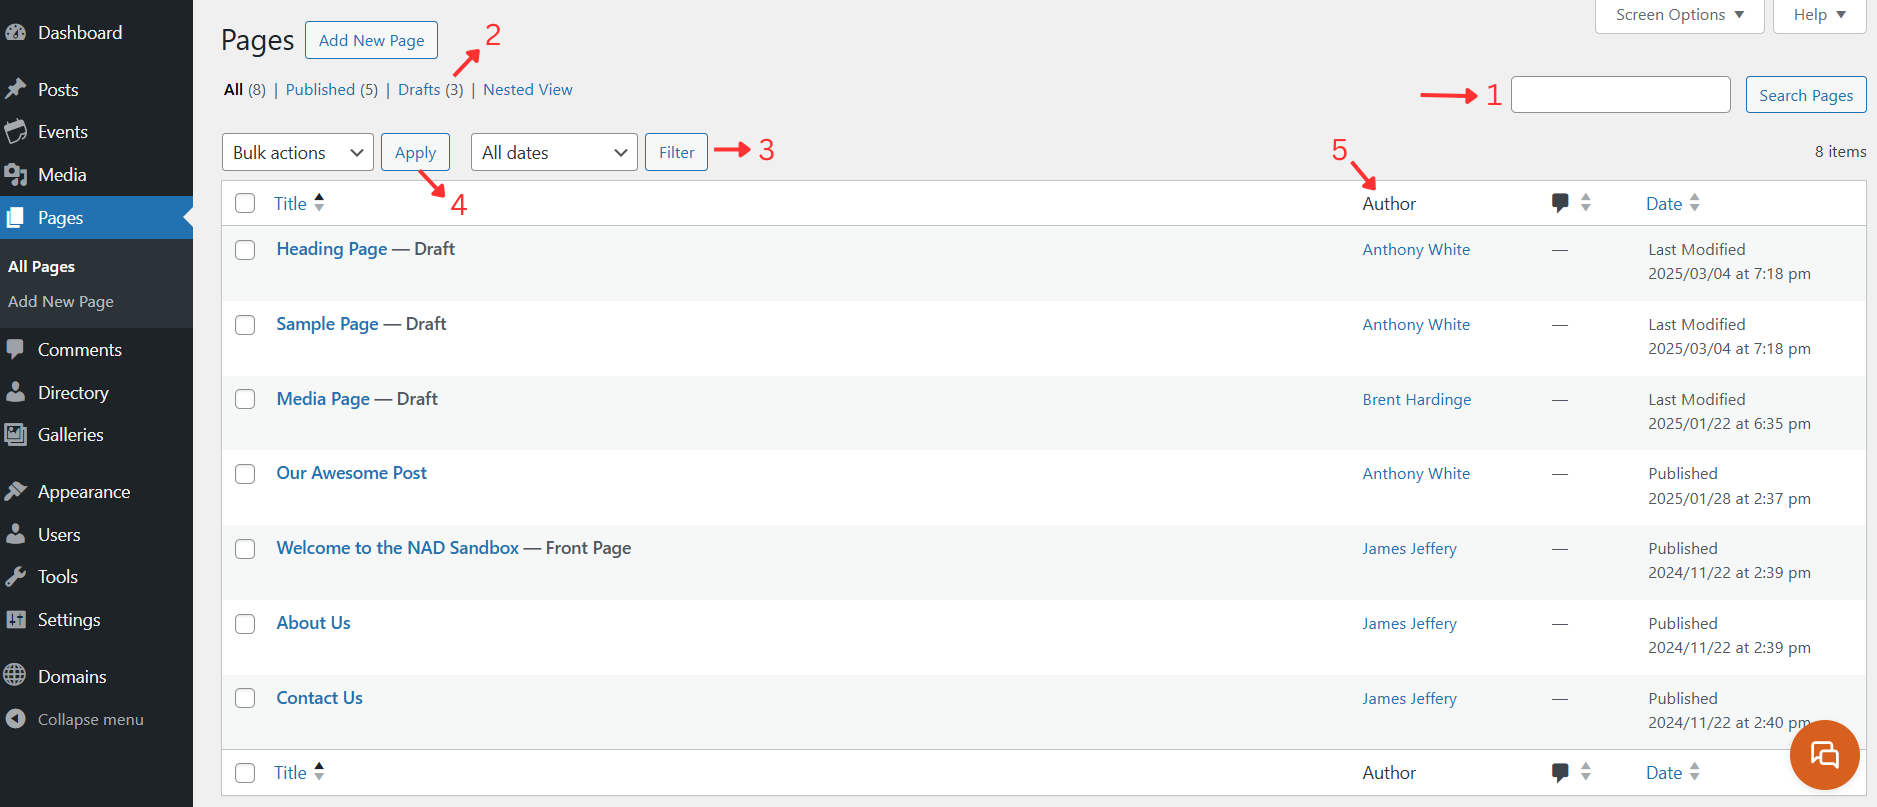
Your Pages screen offers several helpful tools:
Use the search box to quickly find pages by title
Filter pages by status (Published, Draft) using the tabs above the list
Narrow results by date using the date filters
Select multiple pages to perform bulk actions like Edit or Move to Trash
Sort your page list by clicking any column header (Title, Date, Author)
Pages Hierarchy
You can create a structured page hierarchy by establishing parent-child relationships between your pages. Click and drag a page under its parent page. It should be indented underneath the parent page. This organization helps visitors navigate your site more easily.
For example, you could create:
About Us (parent page)
Our Mission
Leadership Team
History
Beliefs
Location
Ministries (parent page)
Youth Group
Women's Ministry
Men's Fellowship
Community Outreach
Bible Study
This hierarchical structure creates a logical organization that helps visitors find information while reflecting your ministry's structure.
Changing the URL of a page
To modify a page's URL (also known as its "slug"):
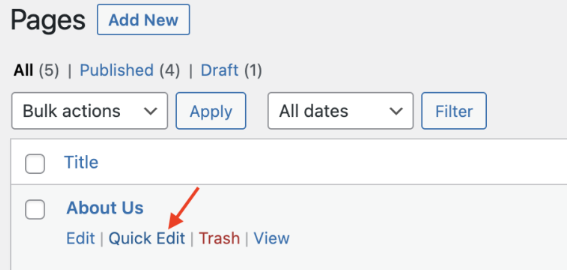
Go to the Pages screen in your WordPress dashboard
Find the page you want to modify
Hover your mouse over the page title
When the action links appear, click the Quick Edit link to access the slug field directly.
The Quick Edit panel allows you to modify essential page details without leaving the Pages screen. You can update the page title, slug (URL), publication date, and author. Additionally, you can password-protect the page, mark it as private, change its parent page, adjust page ordering, select a different template, or switch its status between Published, Pending Review, and Draft.
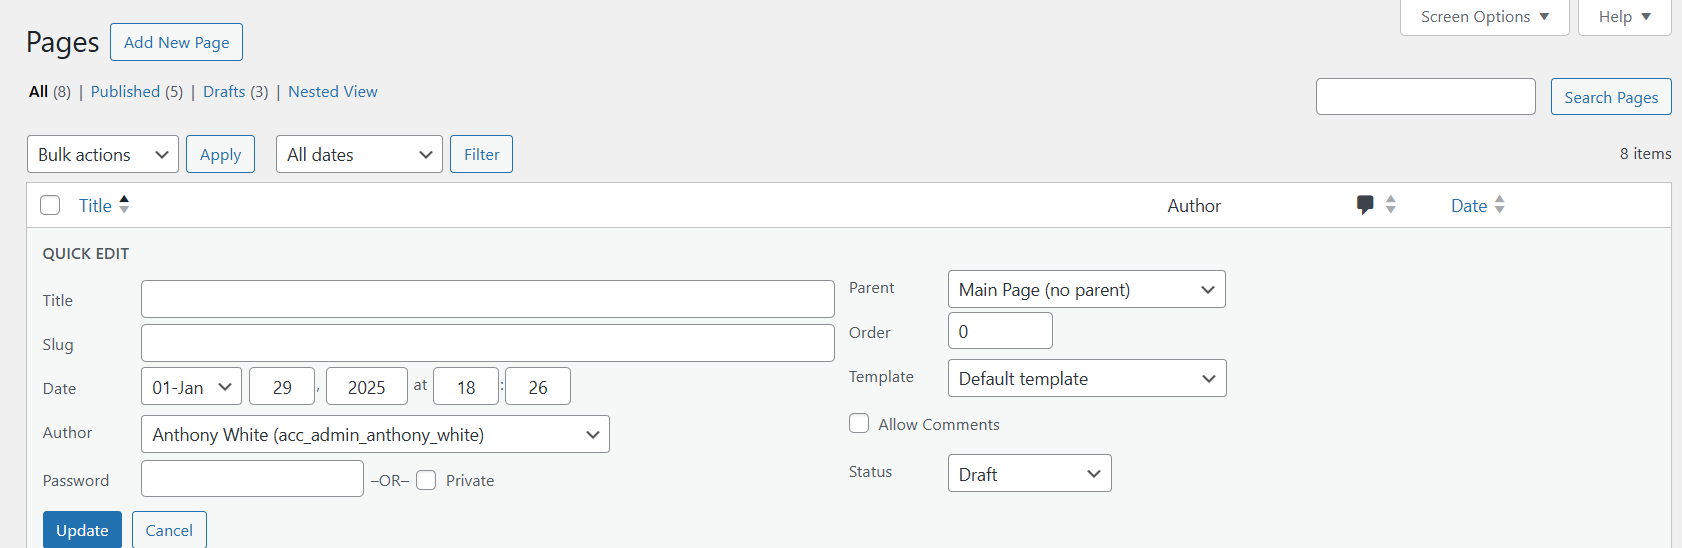
Click the Update button to save your changes.
Page Templates
A template controls the layout of your pages. Unlike themes, which set the design of your entire site, templates affect the appearance and organization of individual pages or groups of pages.
You can set specific pages to use a particular Page Template that comes with your theme, like Page Simple or Page w/ Subnav. Play around with your options to see what fits your content best.
Organizing Posts
Posts can be displayed in a Post Feed on any page, or you can create an Archive page for posts. Posts are primarily organized by Author, Date, Category, and Tag.
When creating a new post:
Click to show the Settings menu on the right hand side
 .
.Add a category by typing in the name of an existing category, or clicking New Category.
Add an Author or Tag in the same way.
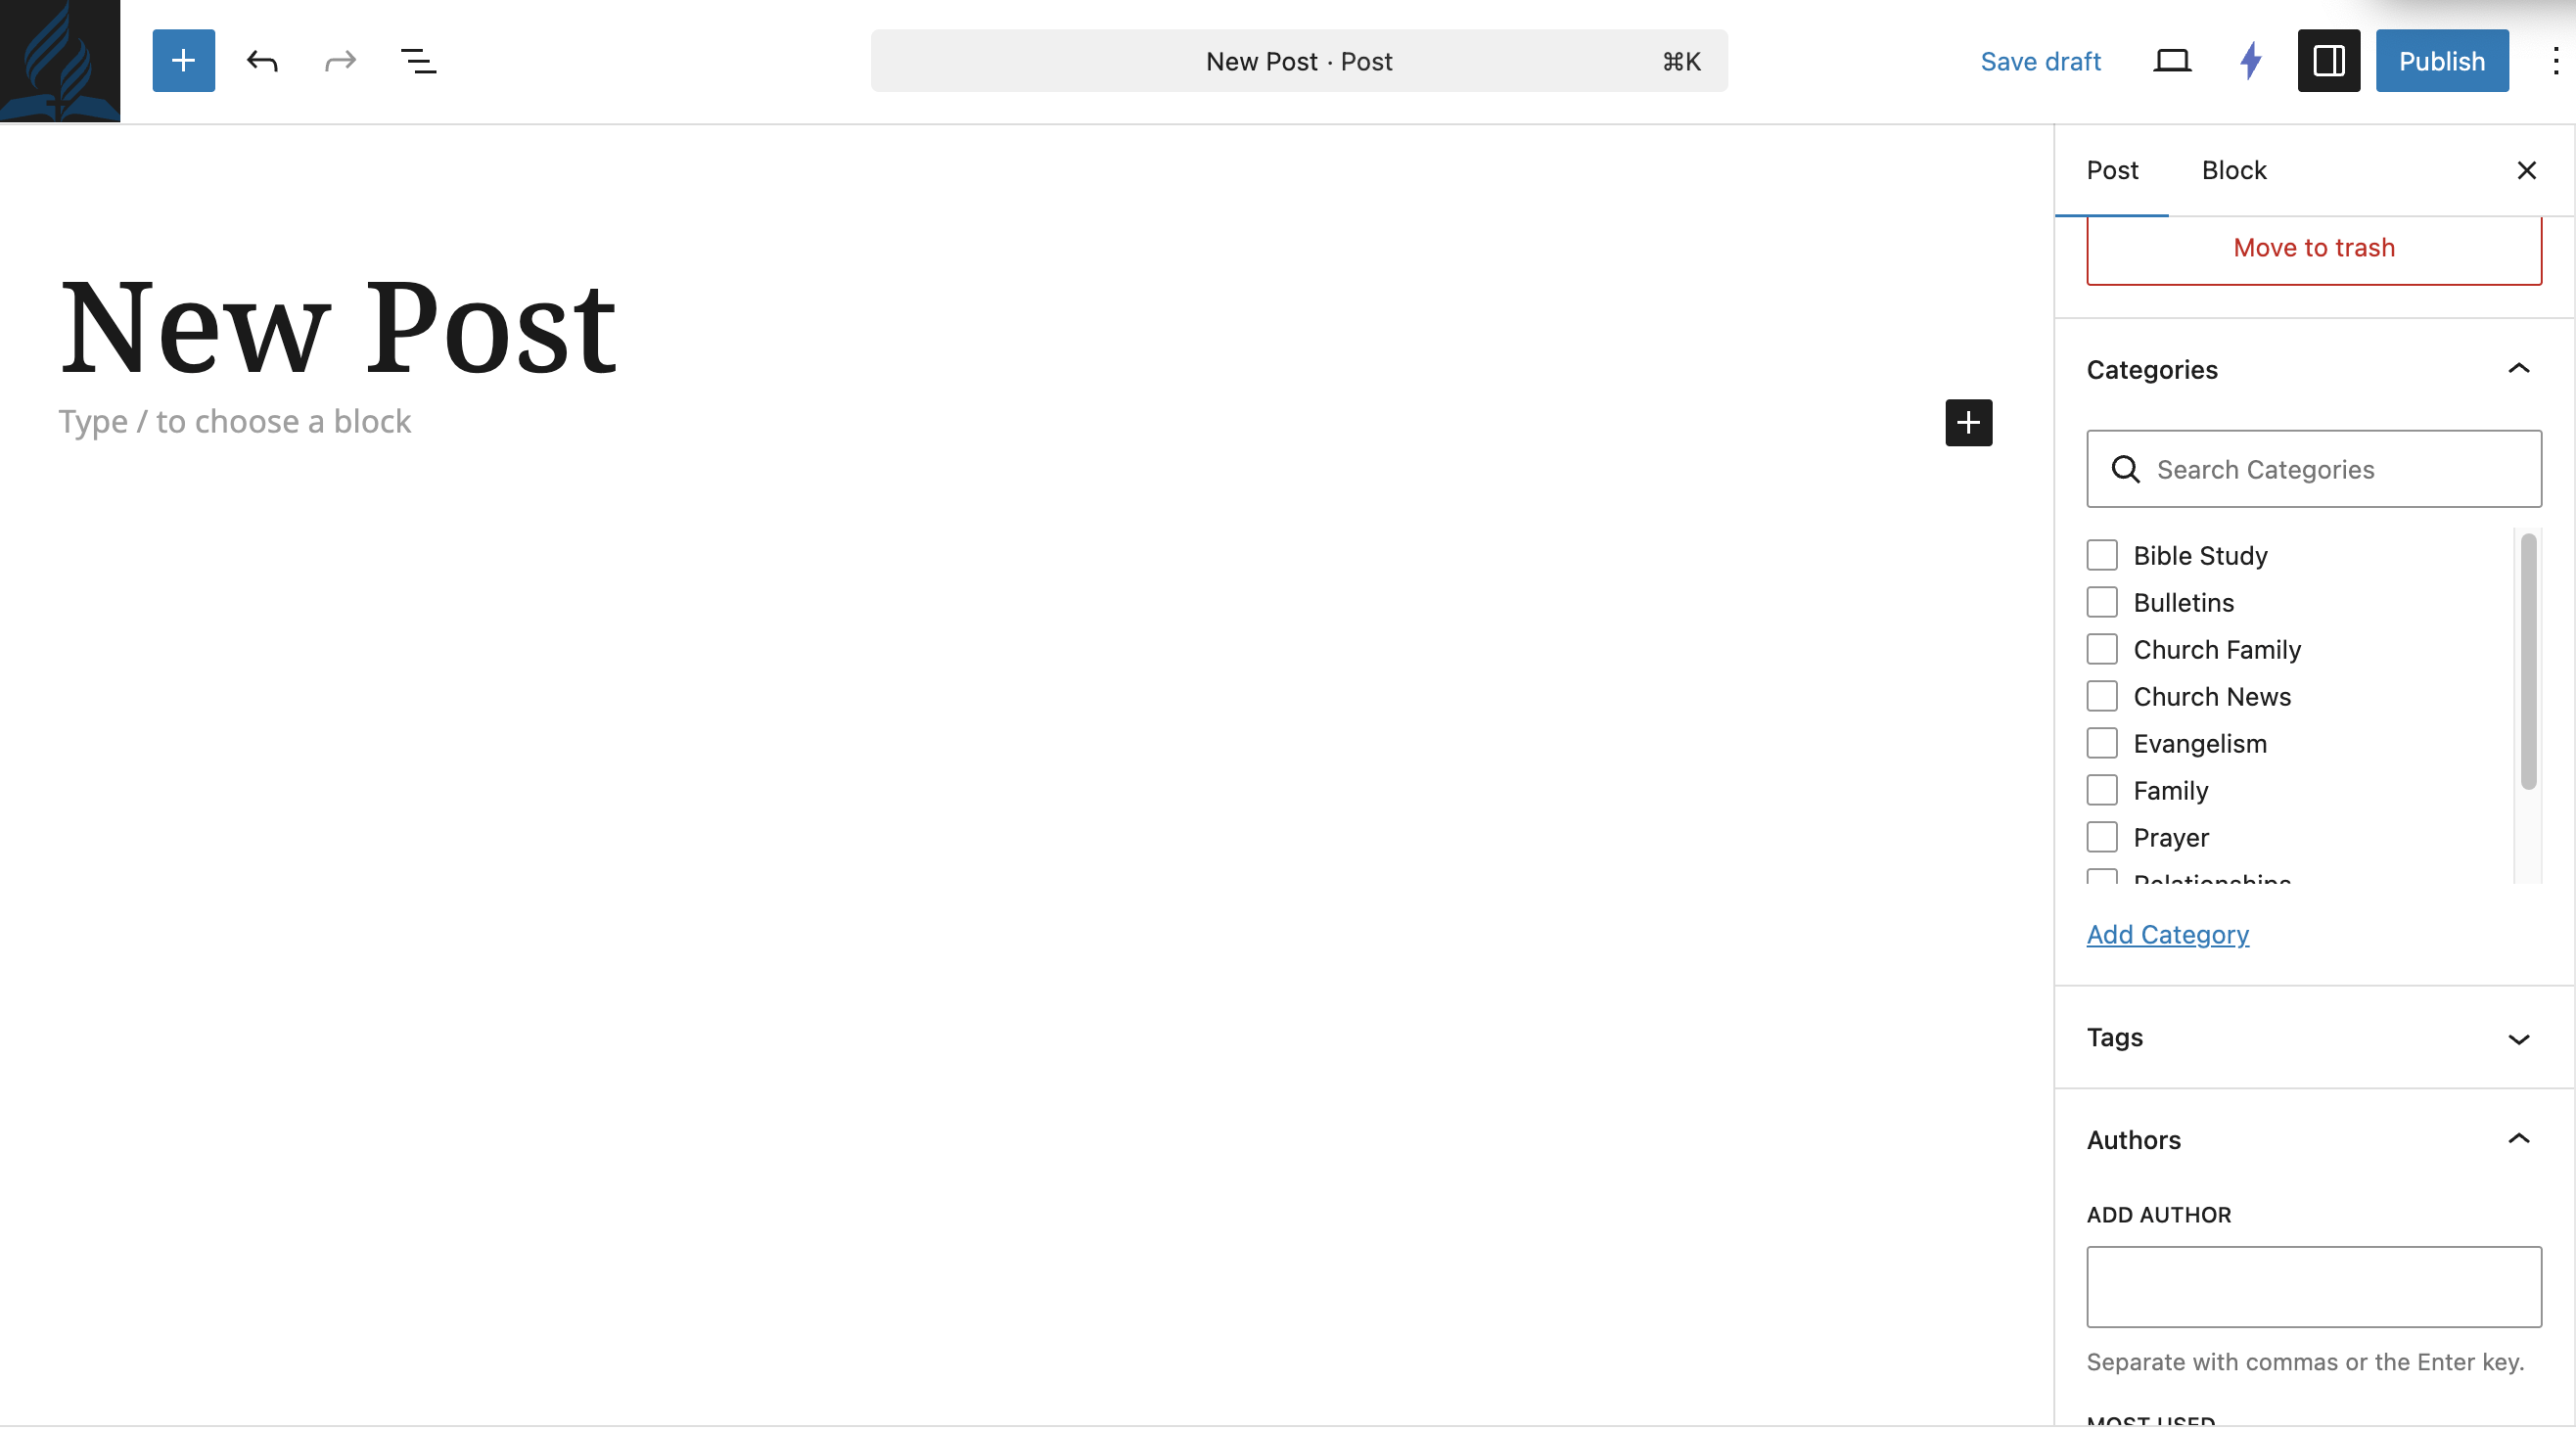
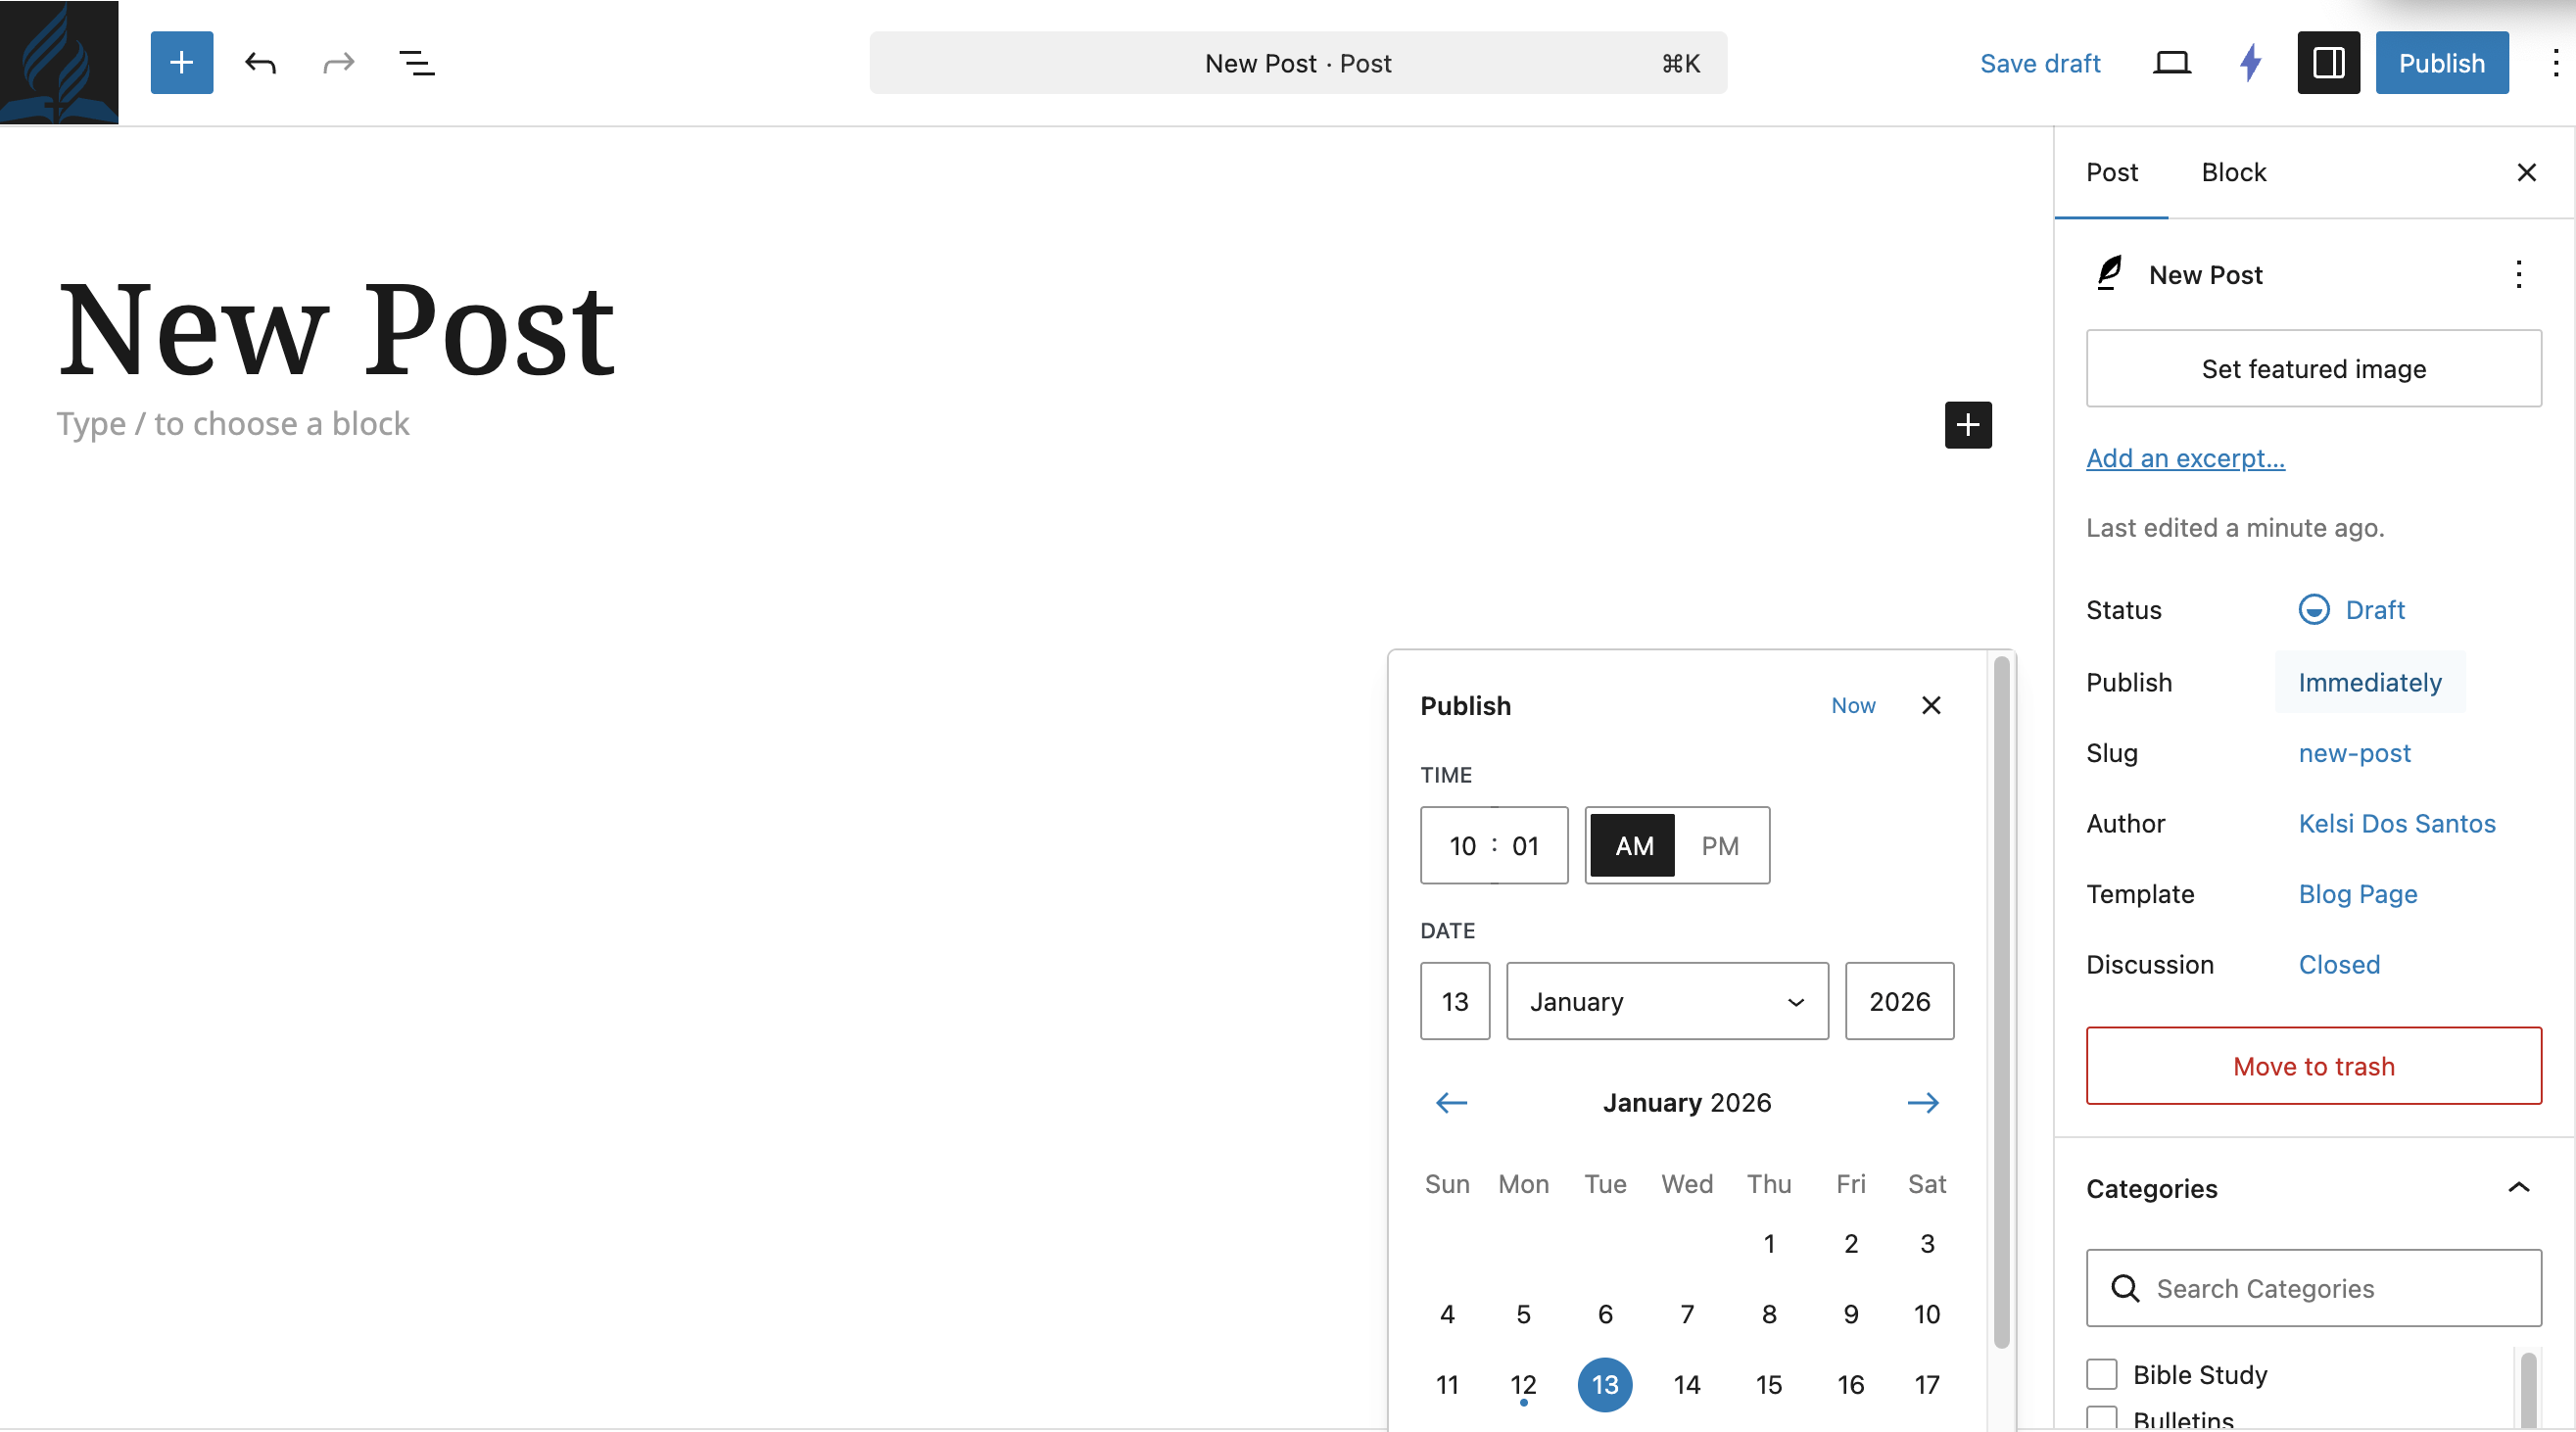
Set the published date by clicking the Publish immediately option to change to a future or past date.
To display posts in an organized way on your page,
Find the page you want to display posts on
Add a Post Feed block to the page.
Edit which posts you want to show on the page by using the Filters options and selecting the categories, authors, dates, or tags to display.