Creating a Blog Post
Log into your WordPress Dashboard.
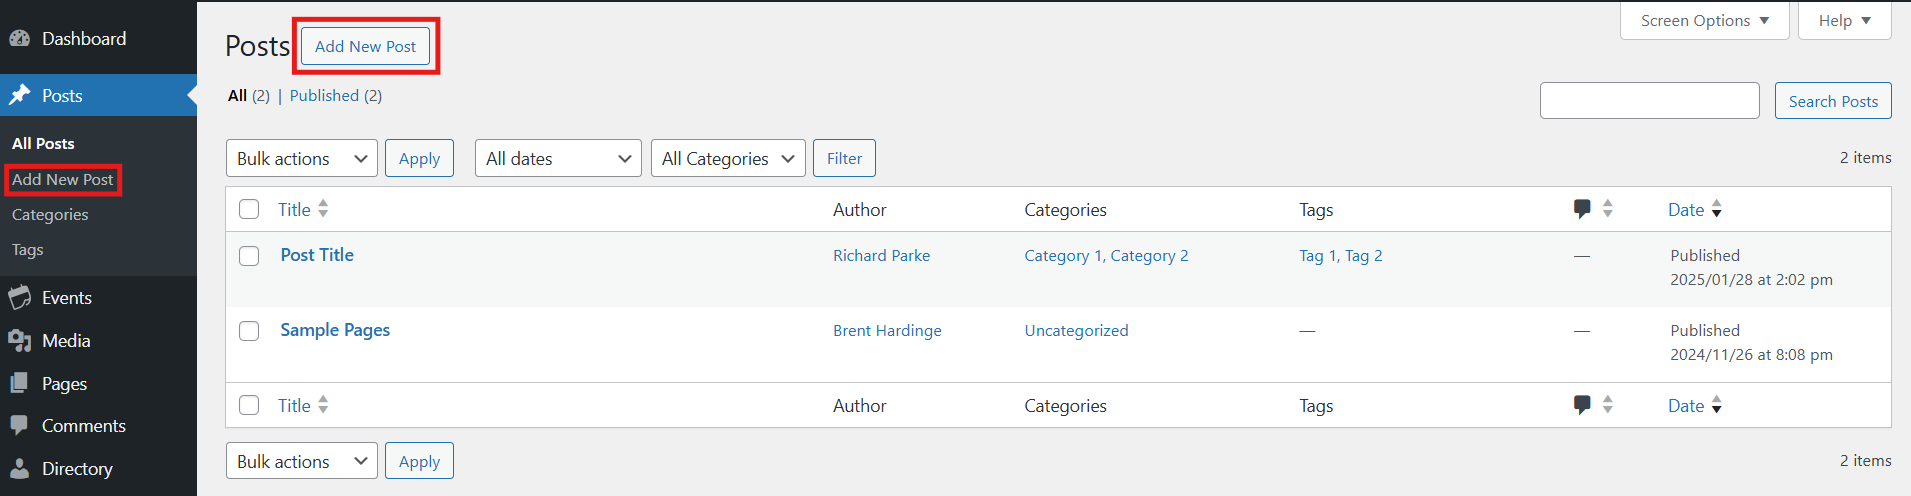
Go to Posts in the left navigation menu.
Select Add New.
Use the editor to create your post.
Enter a title for your blog post and apply any categories or tags to keep your blog posts organized.
Add your content including text, images, videos, and links.
Click Publish when you're ready to share your post on your site.
Add your Blog Posts to a page
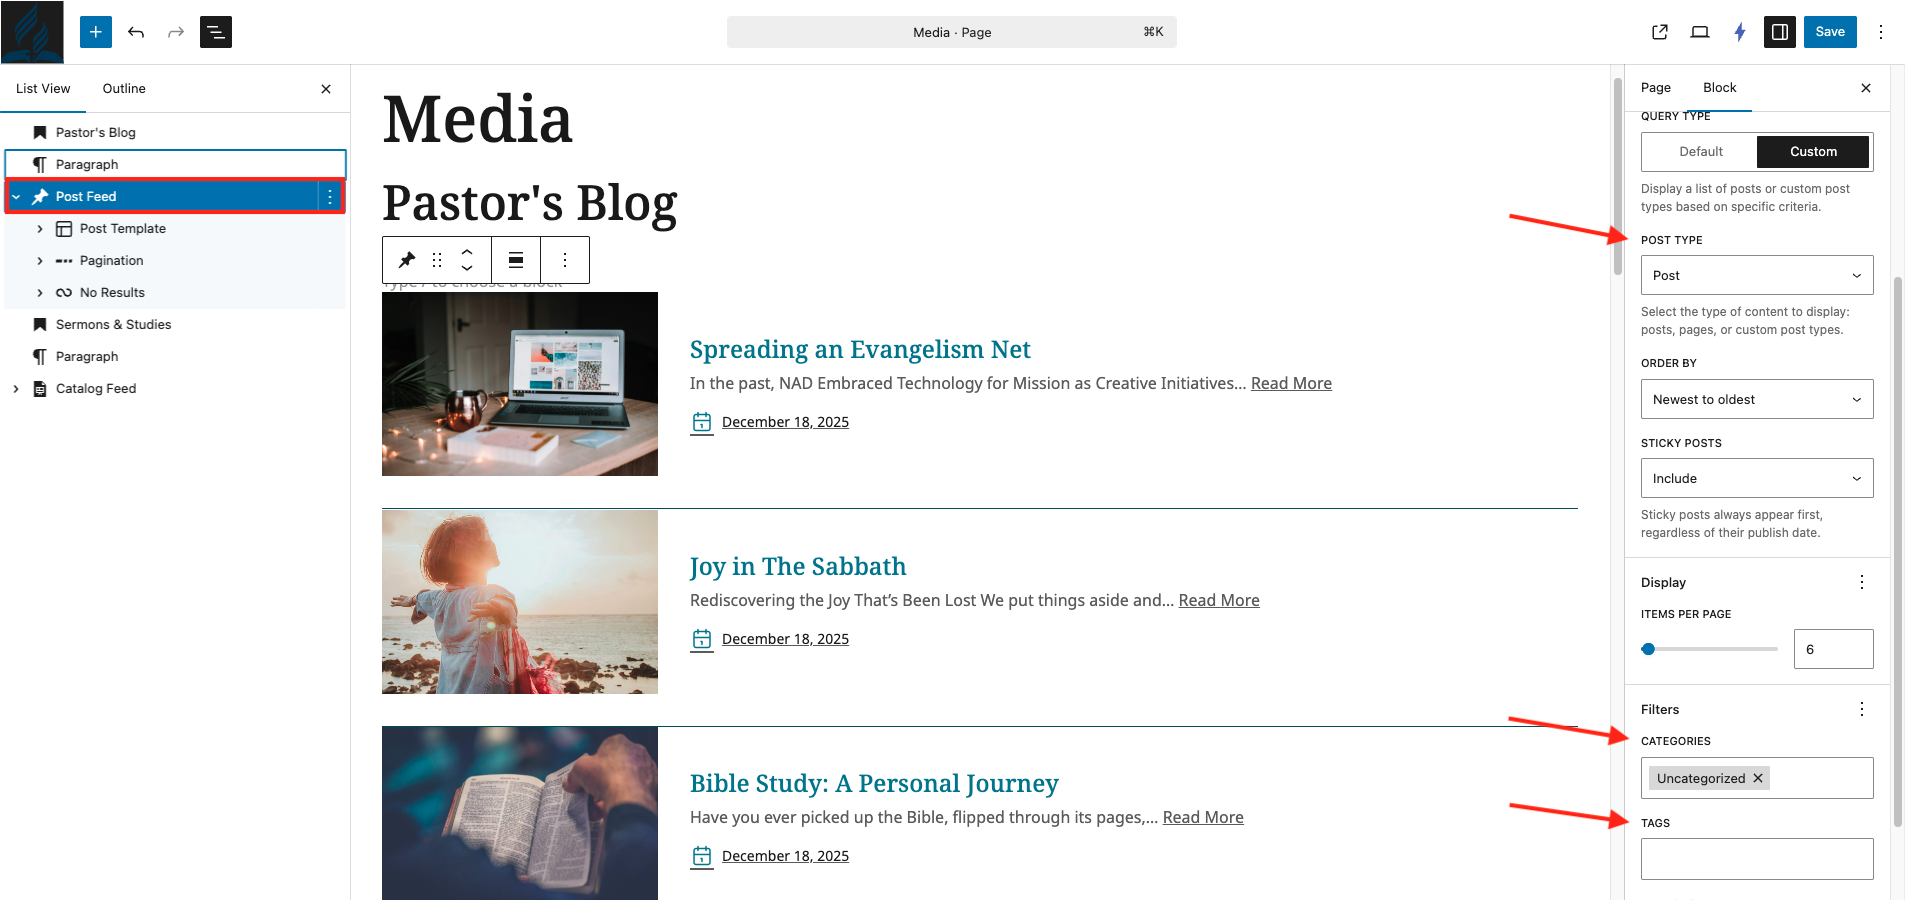
Select the page you would like blog posts to appear on.
In the page editor, add a Post Feed.
In the Block Editor, select Post as the Post Type.
Under the Filters section, select the categories or tags you want to display.
Save your work to display your blog feed.
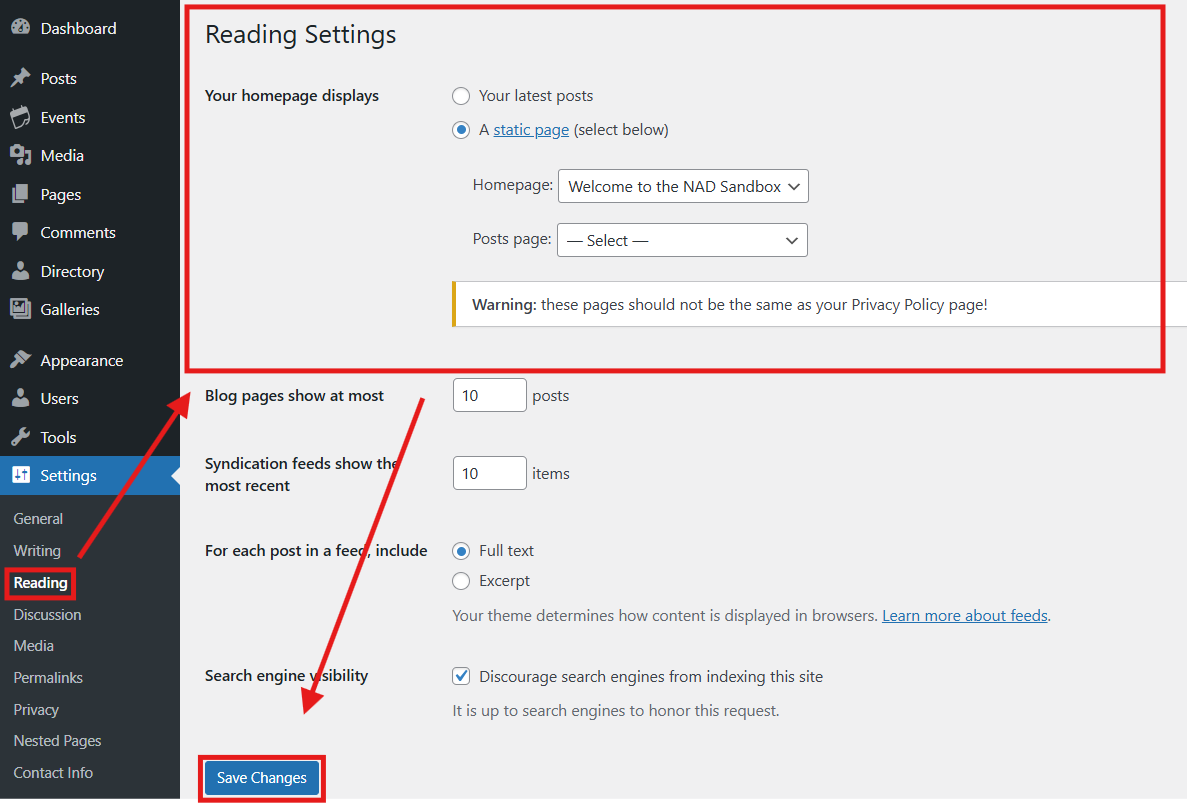
Make your homepage a blog feed
Go to Settings in the left navigation menu.
Select the Reading option.
Choose how your posts will be displayed:
Your Latest Posts: With this default setting, your home page shows all your blog posts.
A Static Page: This option uses a fixed page as your home page and displays blog posts on a separate page you select.
Click Save Changes to update your settings.