Adding a color to an event category helps users visually differentiate between event types. This guide will show you how to assign a color to a new or existing event category. Let's look at the steps:
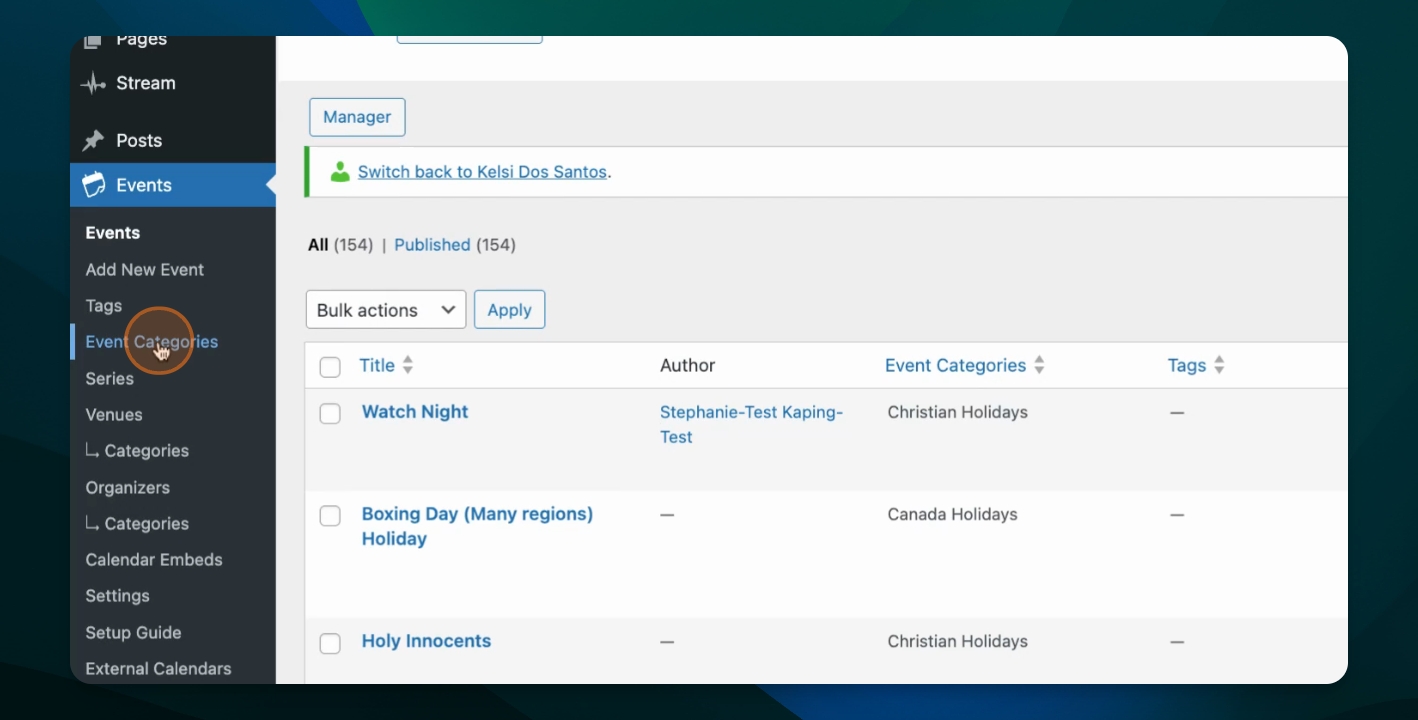
Step 1: Access Event Categories
Log into your dashboard, go to Events, and select Event Categories.
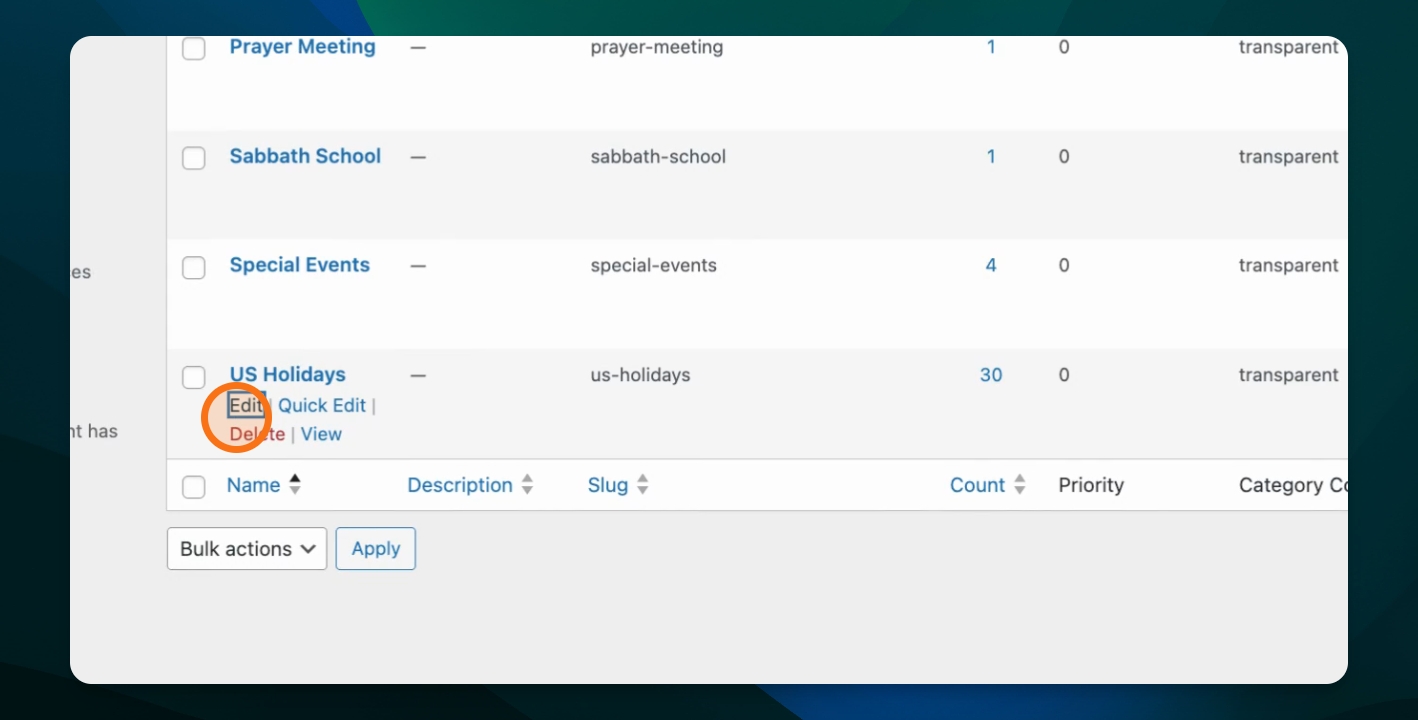
Step 2: Choose a Category to Edit
For a new category: Add the details and select a category color.
For existing categories: Find the category you want to edit and click Edit.
Step 3: Remove Category Color
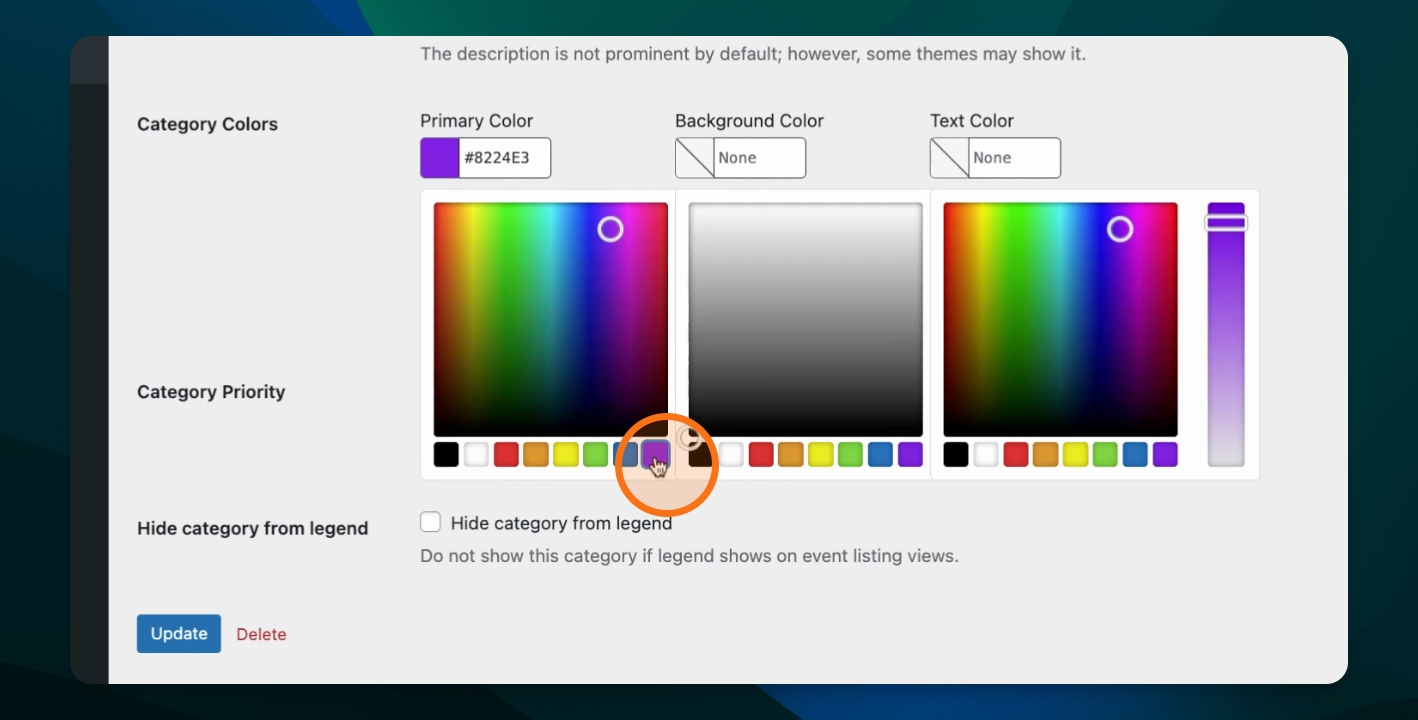
In the category settings, you'll see options for Primary Color, Background Color, and Text Color.
To remove a text color, select it and hit Delete.
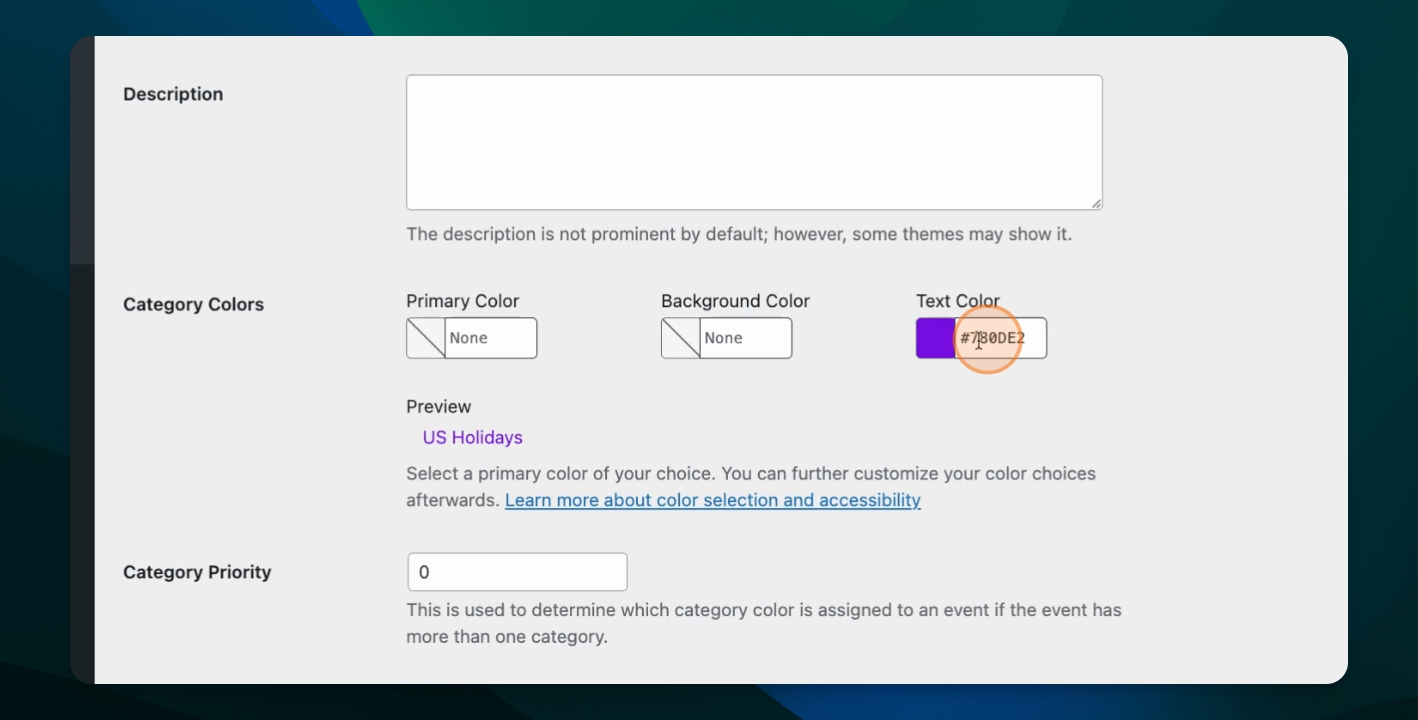
Step 4: Set a Category Color
In the category settings, you'll see options for Primary Color, Background Color, and Text Color.
To set a color, place your cursor in the one of the three fields and select your desired color.
It is best practice to use a primary color and leave the background and text colors unset for optimal contrast.
Leaving background and text colors unset ensures text remains readable.
Step 5: Save Changes
Click Update to apply your changes.
Step 6: Verify Color Assignment
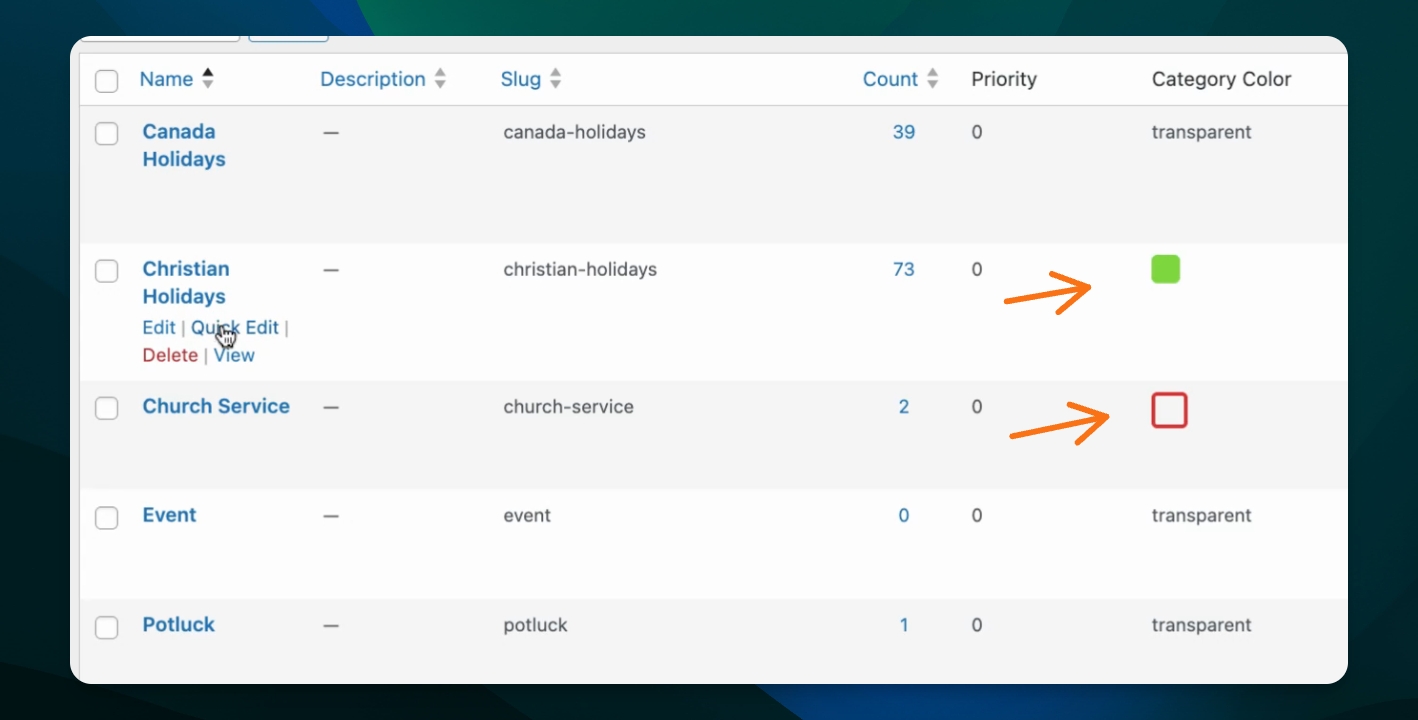
After updating, the assigned color will appear as an square or box in the category list. This helps you quickly see which categories have colors set. In this example, one category has a green background color and the other has a red primary color.
Click Quick Edit on a category to view or adjust the background and primary colors quickly.
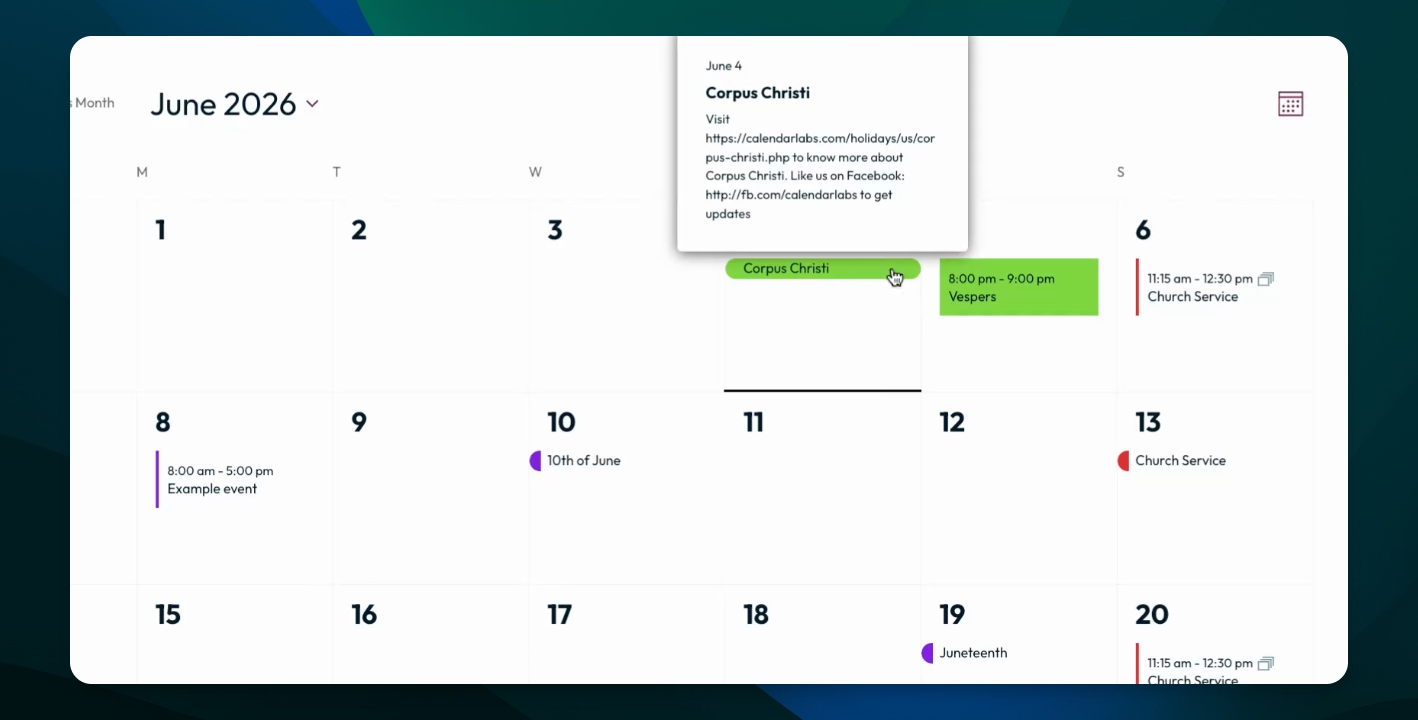
Step 7: Preview on the Front End
Check the front end to see how the category colors appear on events. Timed events and full day events in the same category will be styled differently.