
This guide explains how to create and customize a secondary menu for your website, including adding pages and linking to external resources like PDFs. Let's look at the steps:
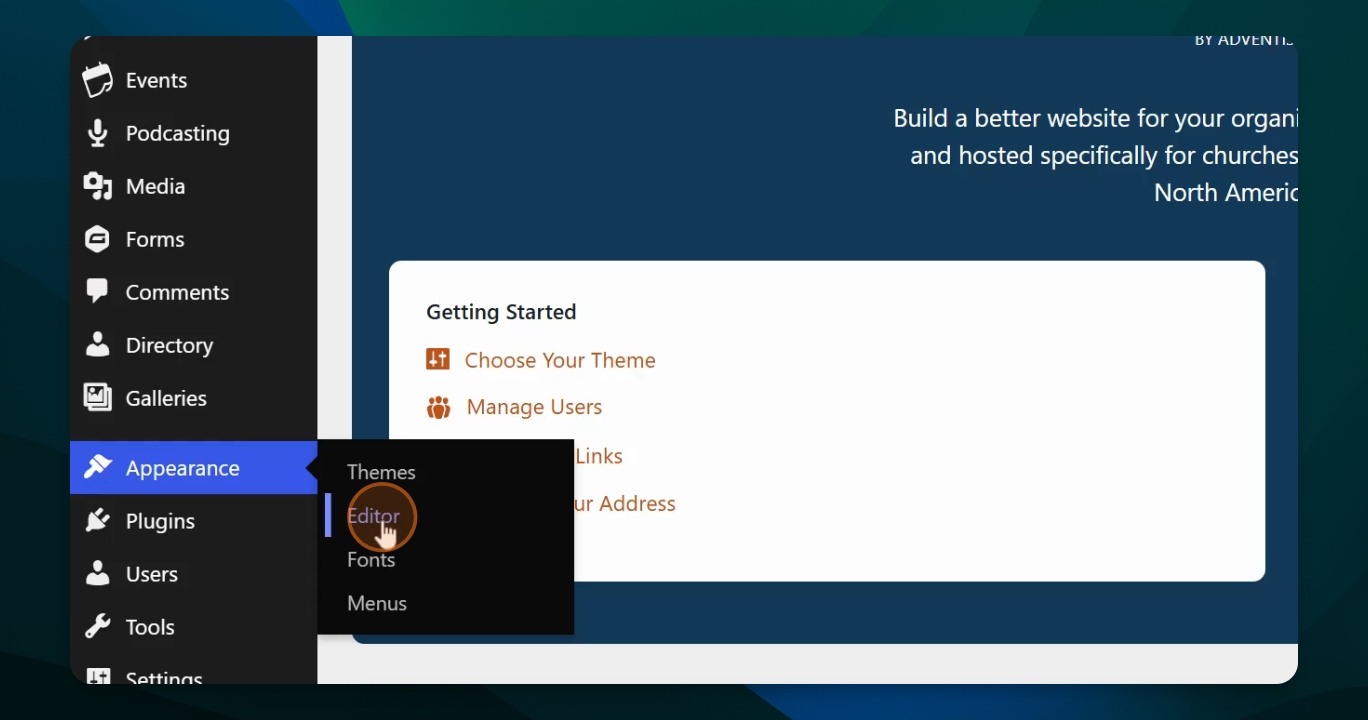
Step 1: Open the Editor
From your dashboard, scroll down to Appearance and click Editor.
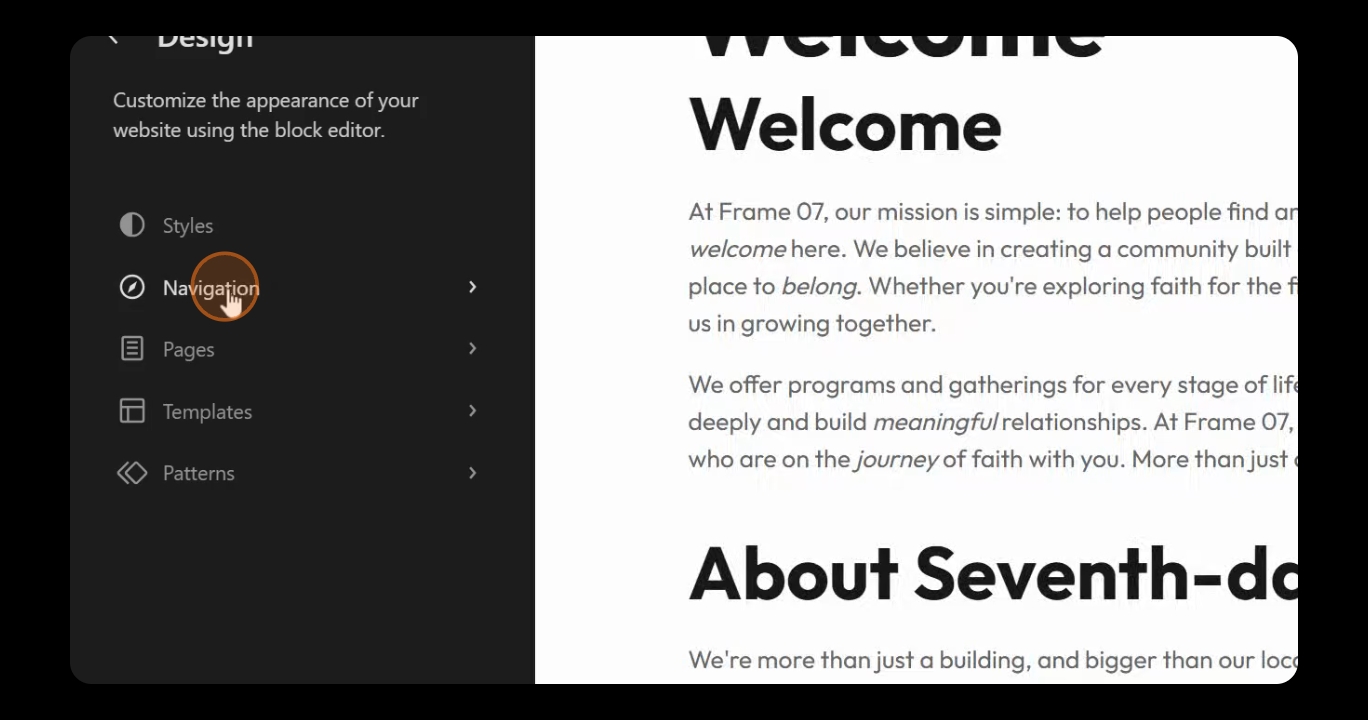
Step 2: Access Secondary Navigation
Choose Navigation from the options, then select Secondary to begin editing.
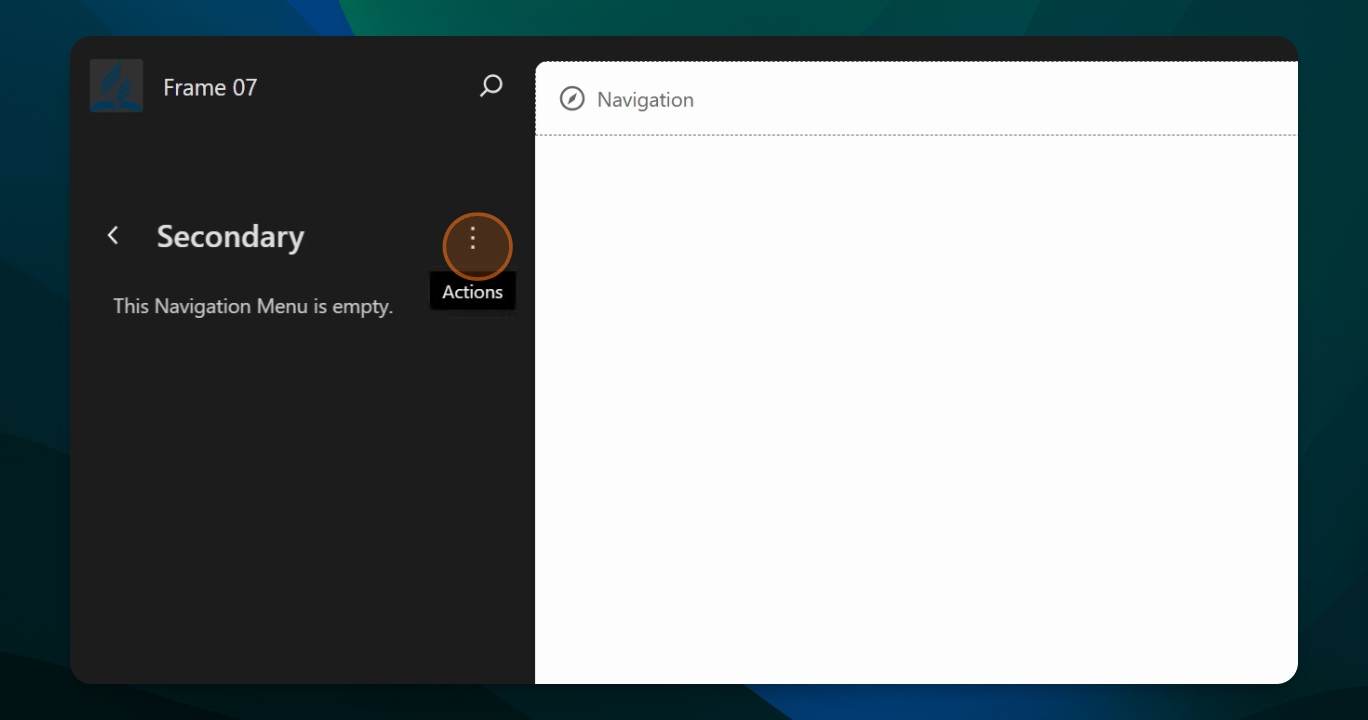
Step 3: Edit Secondary Menu
You can edit the menu by clicking the actions vertical dots or by clicking Navigation at the top. The actions menu allows you to rename, edit, duplicate, or delete the menu. If deleting, ensure you have changed the name to avoid removing the main menu.
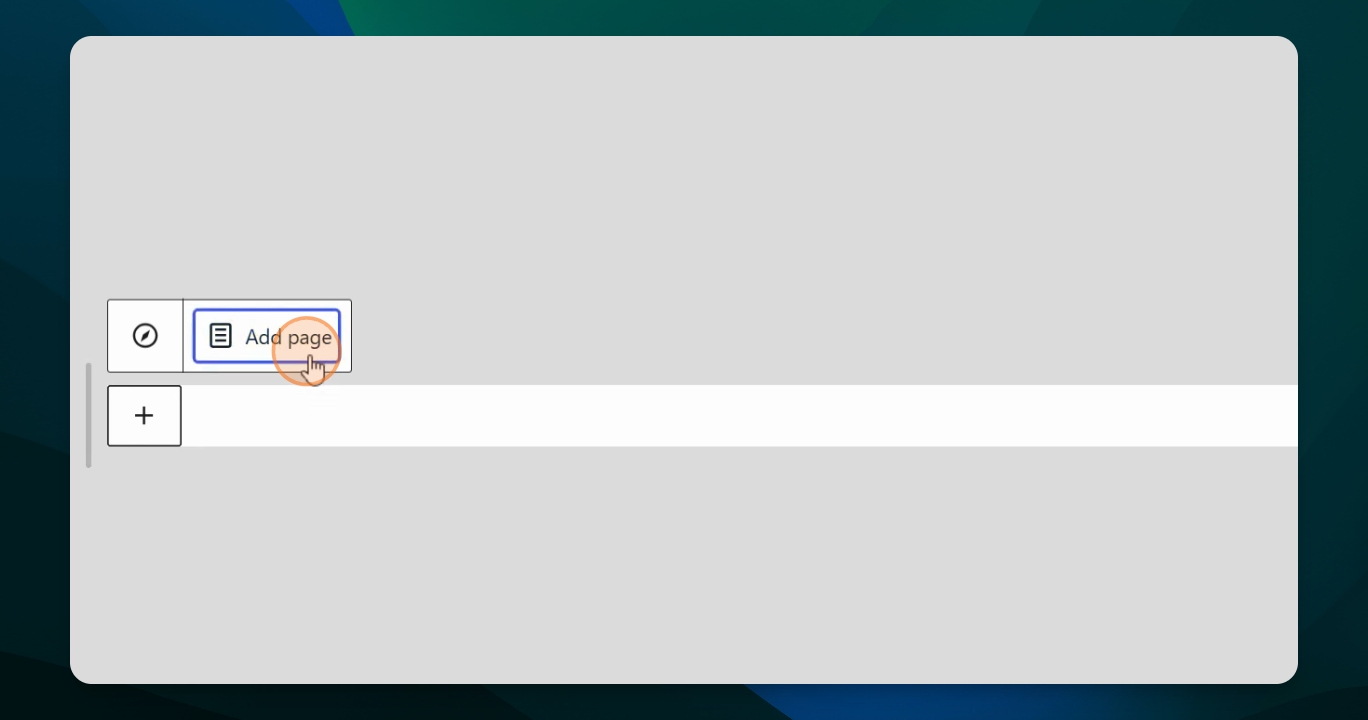
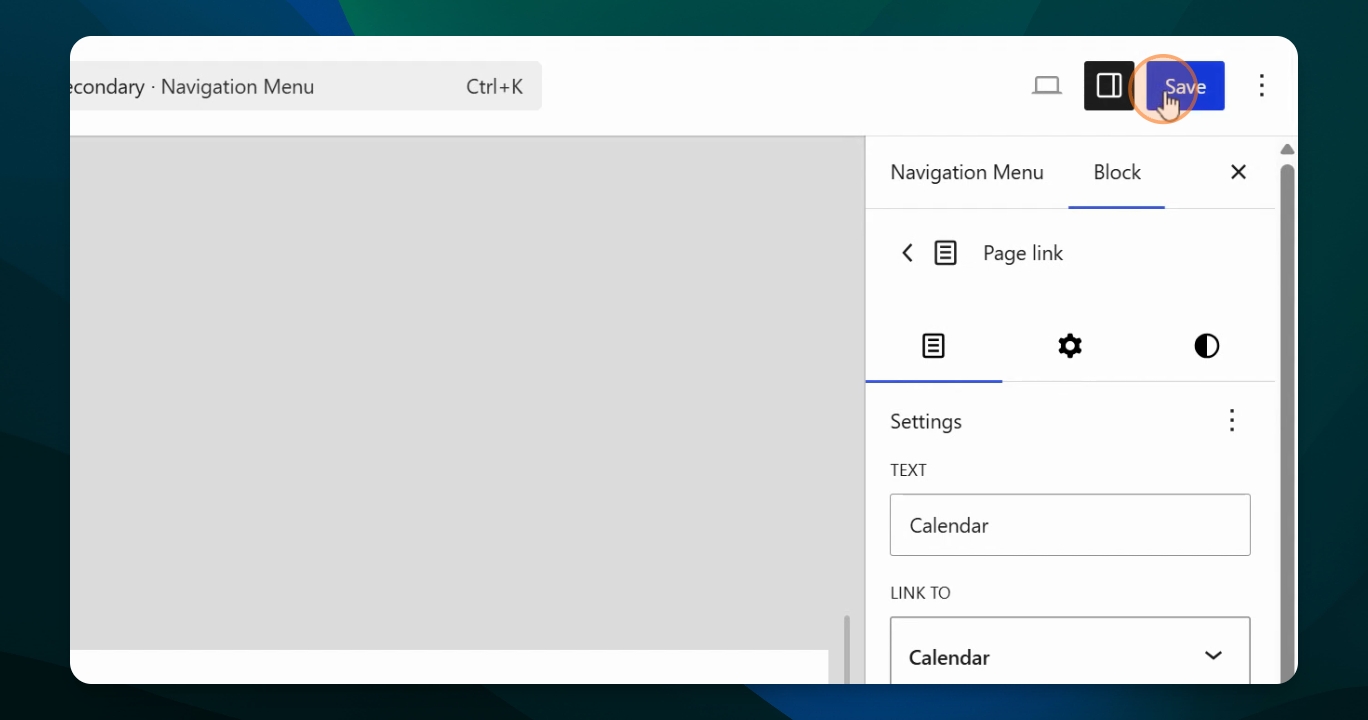
Step 4: Add an Existing Page
To add your first page, type the name of an existing page (e.g., Calendar), select it, and confirm it is published. In the block settings, you will see link and text options for the menu item.
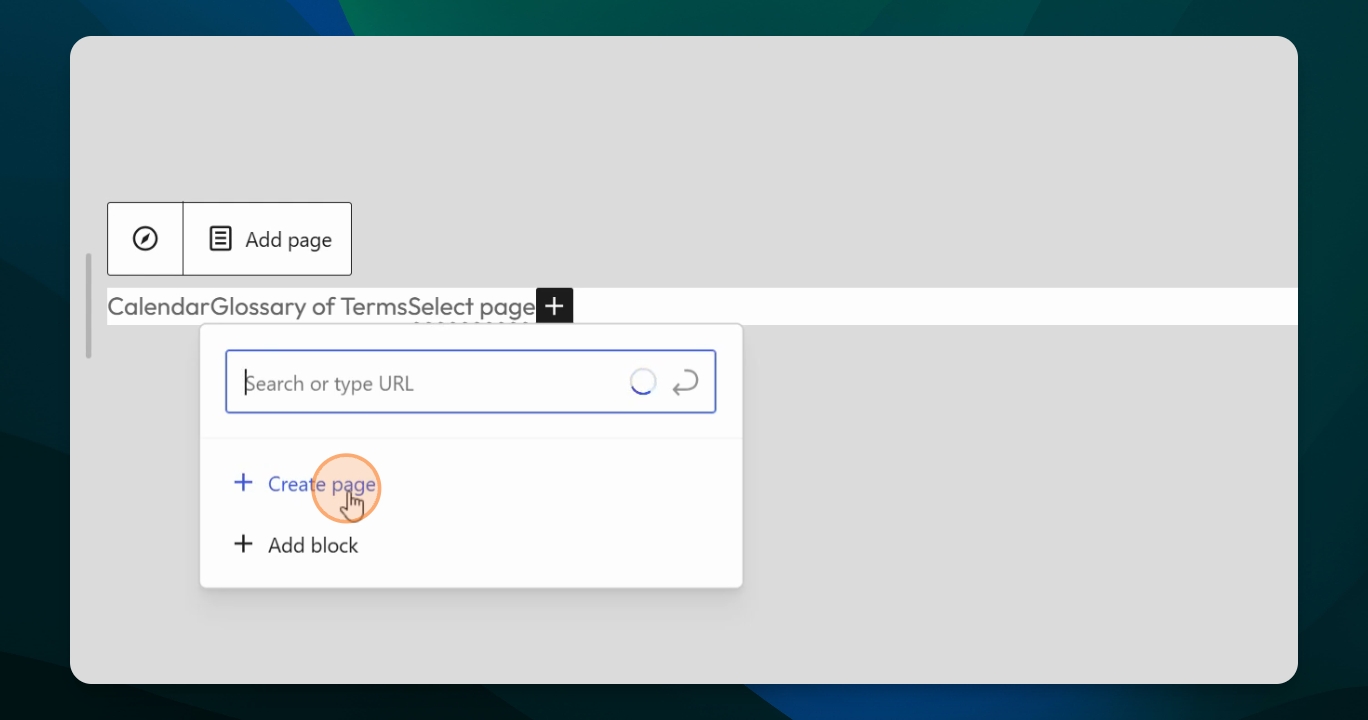
Step 5: Link a Menu Item to a PDF
To link a menu item directly to a PDF, first save your progress and return to the dashboard. Go to your Media Library, select the PDF, and copy its file URL. Return to the secondary navigation editor, add a new page (e.g., Terms), and ensure it is published. Edit the link, unsync it, and paste the PDF URL. Confirm it is set as an external link, then save your changes.
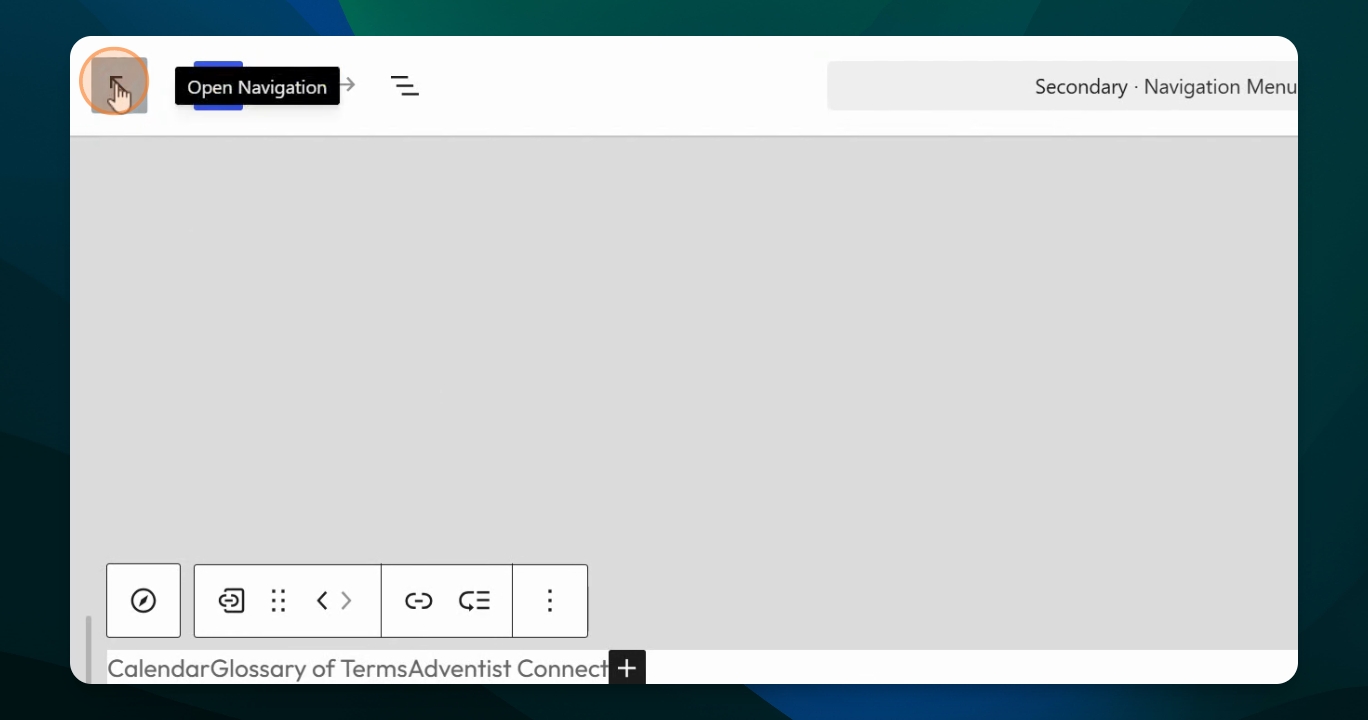
Step 6: Add an External URL Page
To add a menu item that links to an external website, create a new page (e.g., Adventist Connect). Update the link with the full URL, either by typing or pasting it. Apply the link, save, and verify that the menu item directs to the external site.
Step 7: Preview and Finalize
Exit the editor and return to the dashboard. Preview your website to check the secondary menu and make any necessary adjustments. The new menu should now be visible.
When linking to PDFs, updates to that link require repeating these steps to place a new URL in the menu. They do not update automatically.
This process is somewhat advanced but can help you achieve a customized navigation experience on your website.