What are you looking for?
Get help straight from our team...

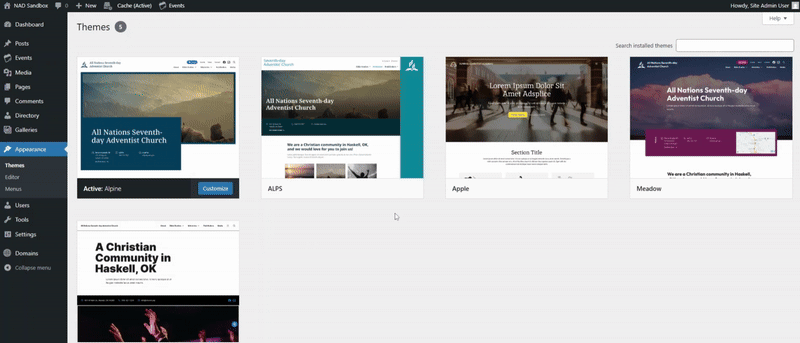
Site Management
Adding a Logo
Adding your logo to your WordPress website helps establish your church's visual identity and creates a consistent brand experience for visitors. This guide will walk you through the simple process of uploading and placing your logo in your site's header, ensuring it displays properly across all pages.
Updated 2 months ago
Creating a Logo Image
If you don't have a logo for your website yet, here are some important tips:
Use a .png file with a transparent background for best results across your site
Keep the design simple so it looks good on all different types of screens
Create a smaller version of your logo to use as your site icon (favicon)
Need Help Creating a Logo?
If you don't have design experience, consider using a user-friendly editing tool like Canva to create your logo. These online platforms offer templates, graphics, and easy-to-use design tools that make it simple to create a professional-looking logo for your church or ministry website.
Editing your Site's Logo
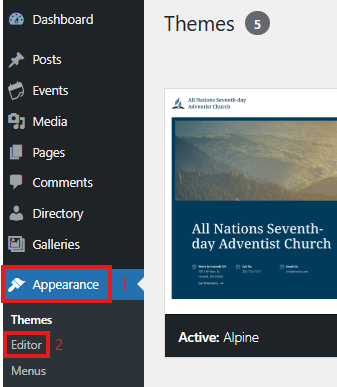
Log into your WordPress dashboard
Go to Appearance → Editor to open the Site Editor
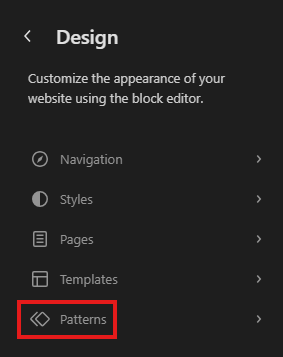
3. Click Patterns to view your site's template parts
4. Scroll to the "Template Parts" section and select the Header template
Once you're in the header editor:
Select the specific Header template you want to modify
Note: Your theme may have multiple header variations available
Click the header preview to open the editing interface
Use the + block inserter button to add a new block
Search for and select the Site Logo block
Upload your logo image when prompted
Adjust the size and positioning as needed
Click Save to publish your changes