What are you looking for?
Get help straight from our team...

Redirection Plugin
Navigating the Redirection Admin Interface
This article explains how to get started with the Redirection plugin’s admin interface, including how to navigate, search, sort, and manage redirects using the built-in tables and bulk actions.
Updated 2 months ago
Getting Started
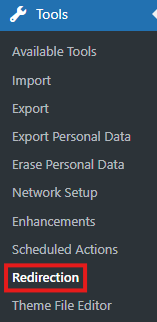
Once you have the Redirection plugin installed, you will see a new menu option under Tools > Redirection in the WordPress admin menu.
Clicking on this option will open the Redirection admin interface, where you can manage your site’s redirects. Upon entering, you will be presented with a list of existing redirects.
At the top of the page is a top menu that lets you navigate to different sections within Redirection.

Navigating Tables
The admin interface of Redirection is primarily composed of tables that allow you to manage redirects efficiently. Below are the key features of these tables:
Search Box
At the top of each table, you will find a search box where you can enter a search term. This will filter the table to show only the items that match your search criteria.
Pagination
If you have more redirects than can fit on one page, you’ll see pagination options below the table.
Use the arrows to move forward or backward, or enter a specific page number to jump directly to that page of results.
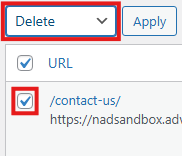
Bulk Actions
The bulk menu allows you to apply actions to multiple redirects at once:
First, select the redirects using the checkboxes next to each item.
Alternatively, click the first checkbox at the top of the table to select all items on that page.
A new option will appear allowing you to select all matching items (based on filters or search terms).
Once the items are selected, choose the bulk action you wish to perform from the dropdown and click ‘Apply’.
Filters
Some pages may offer filter dropdowns that allow you to limit the displayed items based on specific criteria (e.g., groups, categories).
Sortable Columns
Many of the table columns have clickable headings. Clicking on a column heading will sort the results based on that column (ascending or descending). Click it again to reverse the sort order.